Just as the tech industry began settling down following a relentless autumn hardware cycle, Apple has delivered another major surprise. The Cupertino giant officially confirmed a exclusive, hands-on media experience scheduled for October 28, 2026, at 10 a.m. PT in Los Angeles. Dubbed “Pro and Tell,” this showcase departs from Apple’s traditional pre-recorded keynote format […]
Apple’s Four-Week Product Launch Extravaganza: What’s Coming Next It looks like the tech world is in for a chaotic, action-packed month. Rumors and official schedules indicate that Apple is preparing a multi-week rollout strategy. Rather than dropping every single device in one giant multi-hour keynote, Apple is spreading its autumn launch lineup across four consecutive […]
Apple unveils HomeView, Apple TV 4K, HomePod mini 2 and smart home accessories. Compare prices, release dates, device requirements and subscription costs.
HomePod mini 2 can serve as a Mac speaker for movies, gaming, and video calls. Here's what Apple confirms about compatible Macs, stereo pairing, setup, and microphone limitations.
Apple's fourth-generation Apple TV 4K supports four HomePods in surround sound. Here are the confirmed speaker combinations, total hardware costs, and remaining setup questions.
Apple's new HomeView brings personalized Siri AI into competition with Amazon's Echo Show 11. Here's how the two smart displays compare on features, compatibility, privacy, and price.
For fifteen years, Apple was the friend who shows up to the party an hour late and then insists it brought the best snacks. Tim Cook even had a motto for it, saying Apple was perfectly fine with not being first. Then John Ternus took over on September 1, and the snack table got crowded fast. In six weeks Apple has revealed the foldable iPhone Duo, a HomeView smart display in tabletop and wall-mounted versions, and nine smart home accessories. That makes twelve fresh designs, a wild number for a company that used to agonize over one hinge.
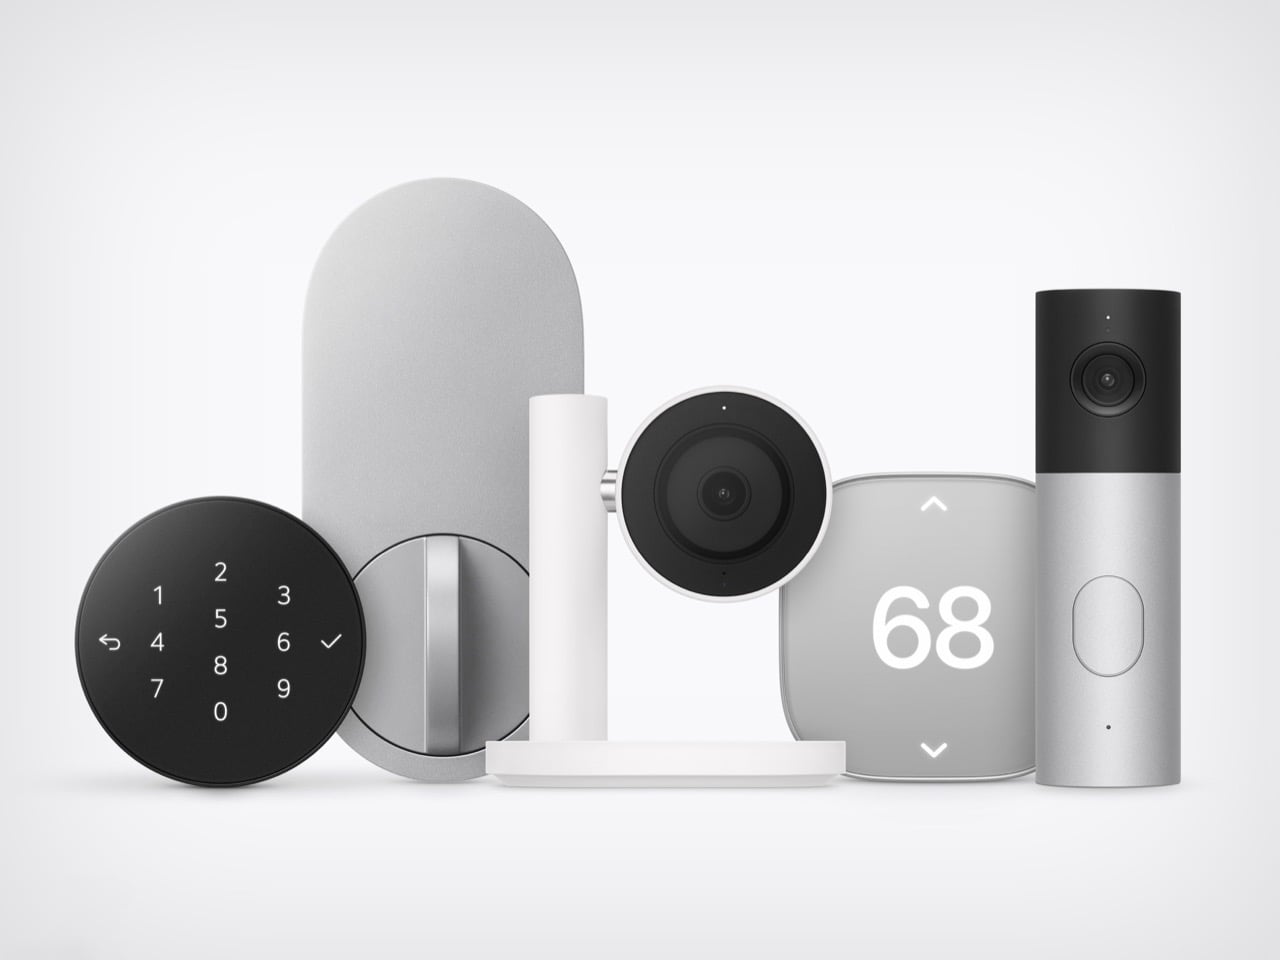
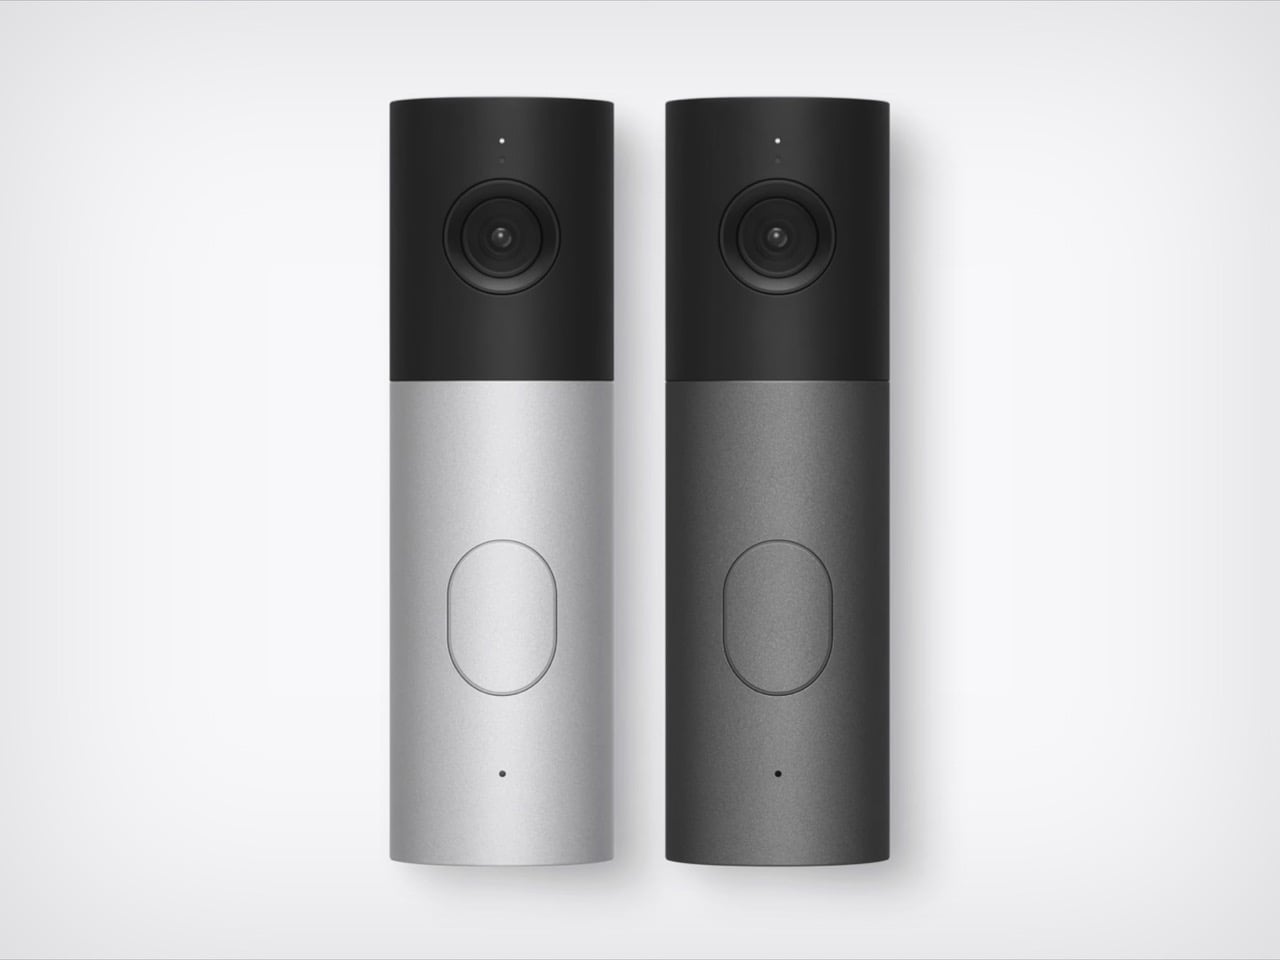
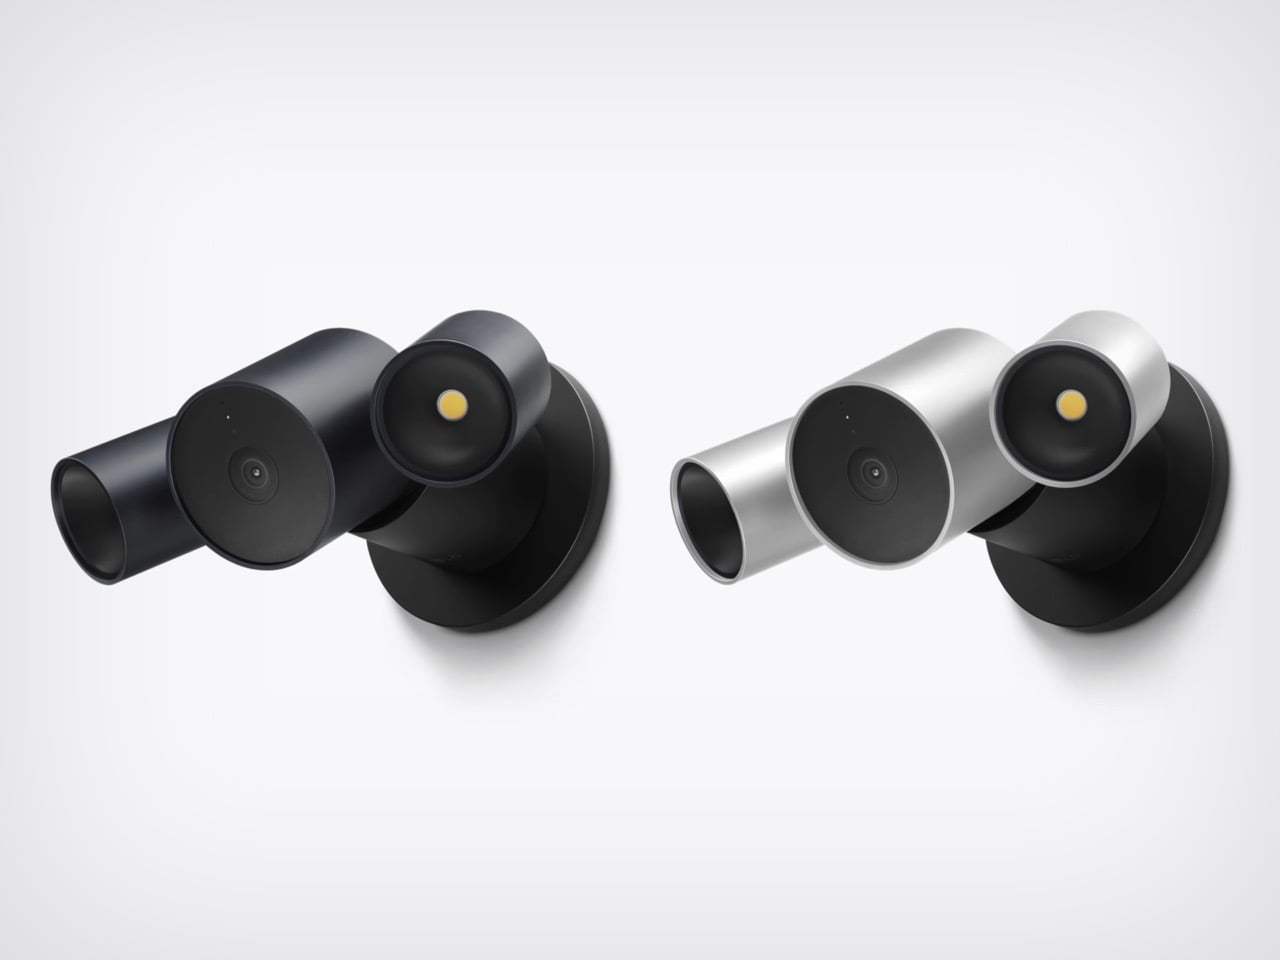
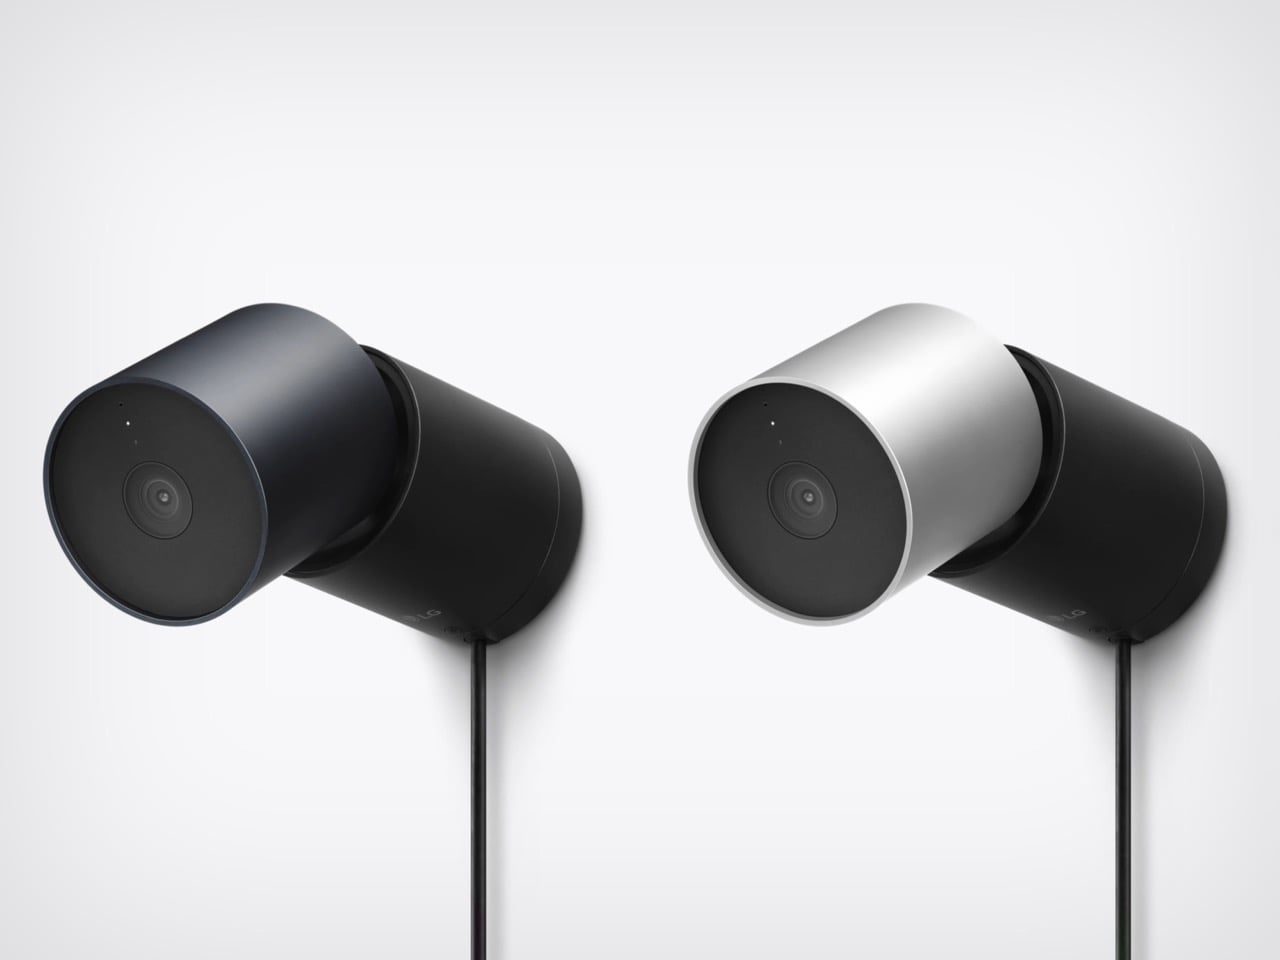
HomeView and the foldable will get the splashy coverage, but the real fun is the smart home gear. LG Electronics and Schneider Electric helped Apple build a video doorbell, a floodlight cam, outdoor and indoor cams, a deadbolt, two thermostats, and two sensors. They start arriving in December, with prices running from $39.95 for a sensor to $399.95 for the floodlight cam. Apple’s fingerprints are all over them, from the aluminum to the black glass to the rounded shapes. I am here to tell you why that deserves a small celebration.
Designers: LG and Schneider for Apple
The ROKR Taught Apple to Keep the Design and Rent the Factory
In September 2005, Steve Jobs launched the Motorola ROKR E1, a rebadged Motorola phone with an iTunes button and a cap of 100 songs. The demo stumbled and the phone flopped. Jobs looked pained onstage, and you can see why, since Apple’s software was riding around in someone else’s hardware. Roughly sixteen months later he unveiled the iPhone. The ROKR was a stepping stone he needed, taken at exactly the moment he needed it.
Ternus gets to run that play with the lesson already learned. Bloomberg reports that Apple shaped the design, features, and engineering of the LG gear, while LG handles manufacturing and support. The ROKR was Motorola’s design wearing Apple’s software. This is Apple’s design wearing LG’s factory. Ternus joined Apple in 2001, so he watched the ROKR saga from the inside, and the LG deal likely began on Cook’s watch but ships under Ternus, which puts it in his column.
Nine Products, One Family Look From Two Different Companies
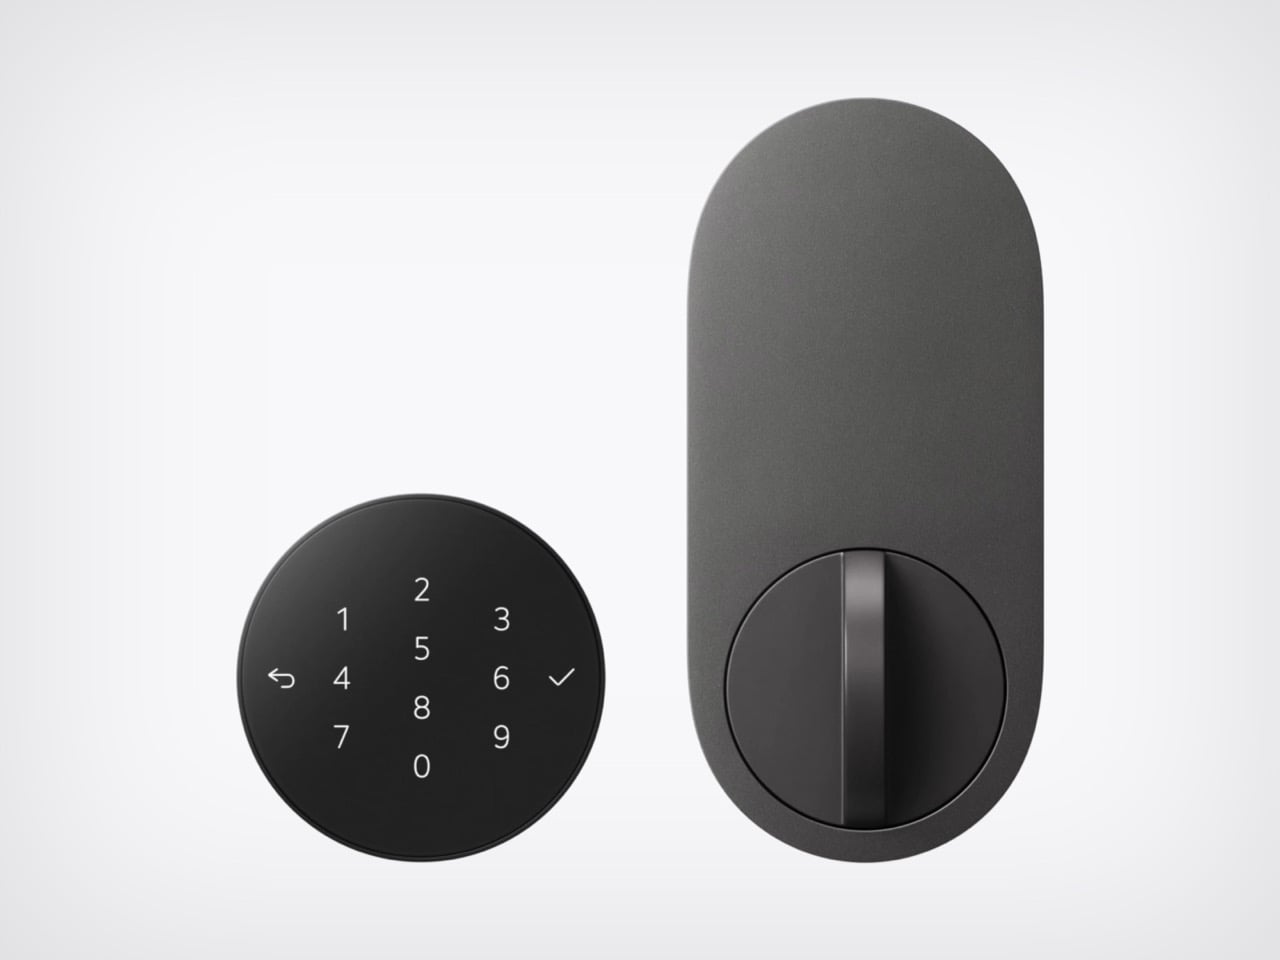
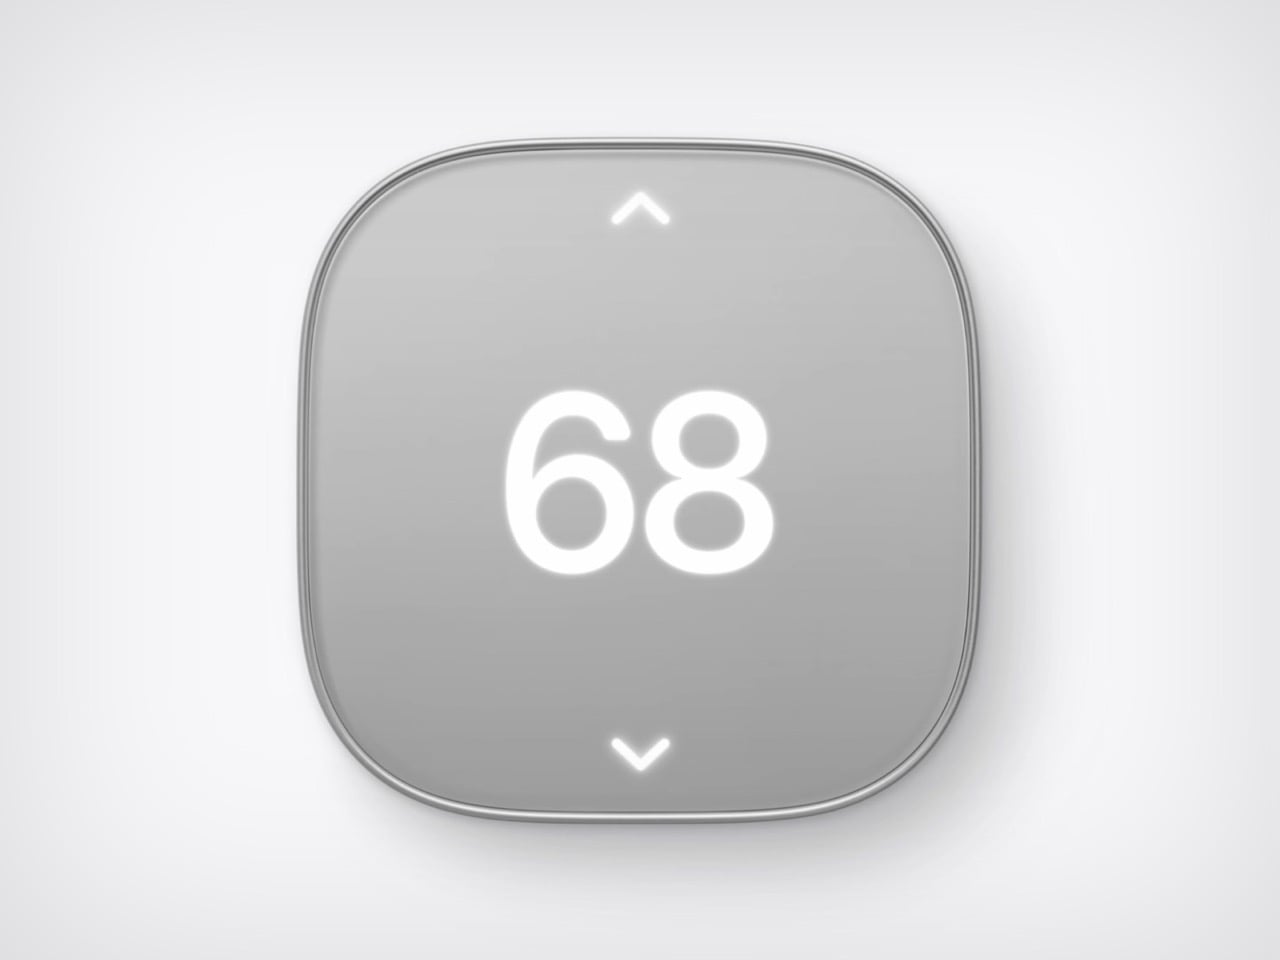
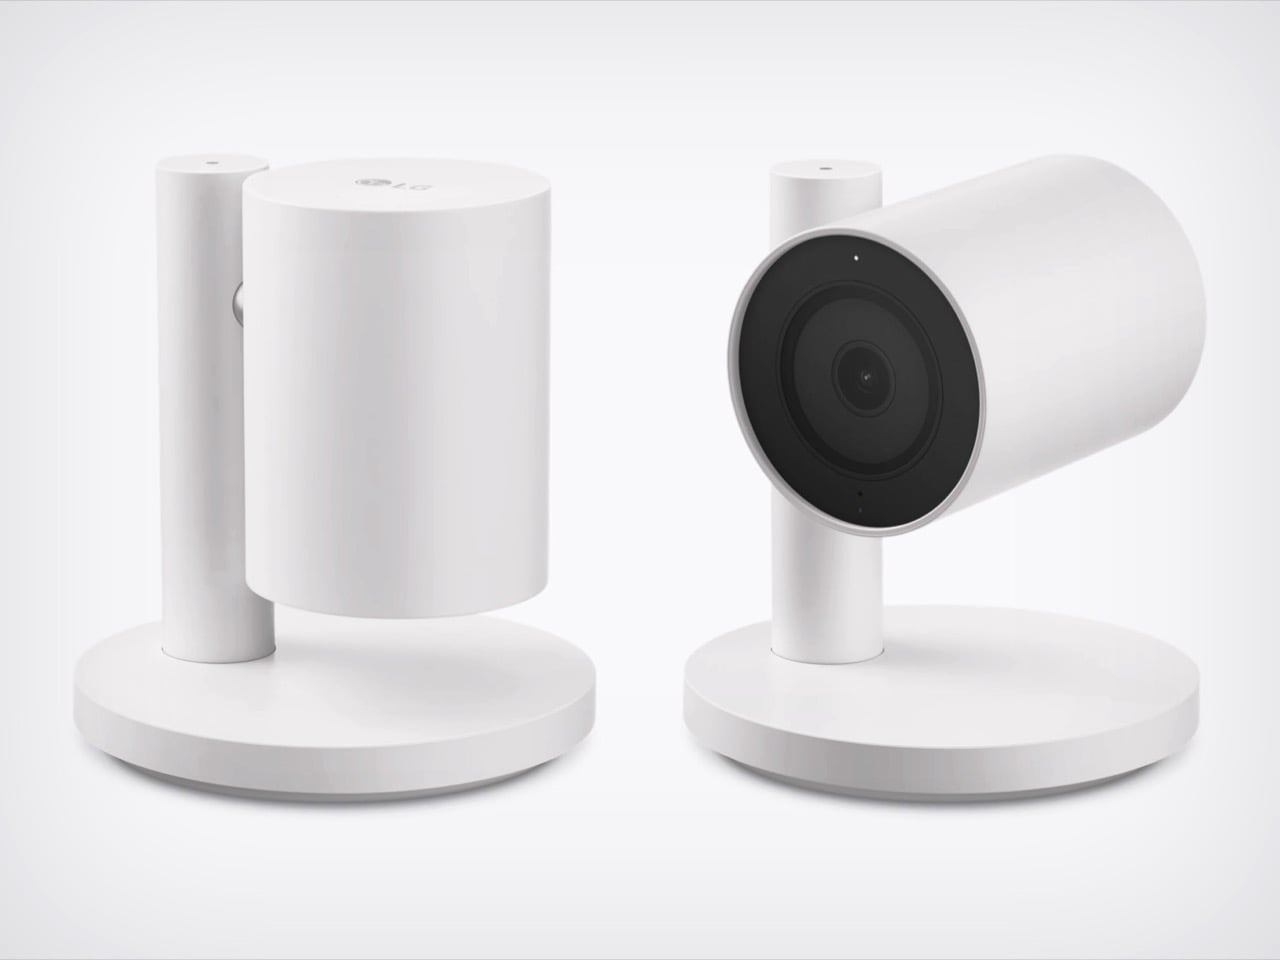
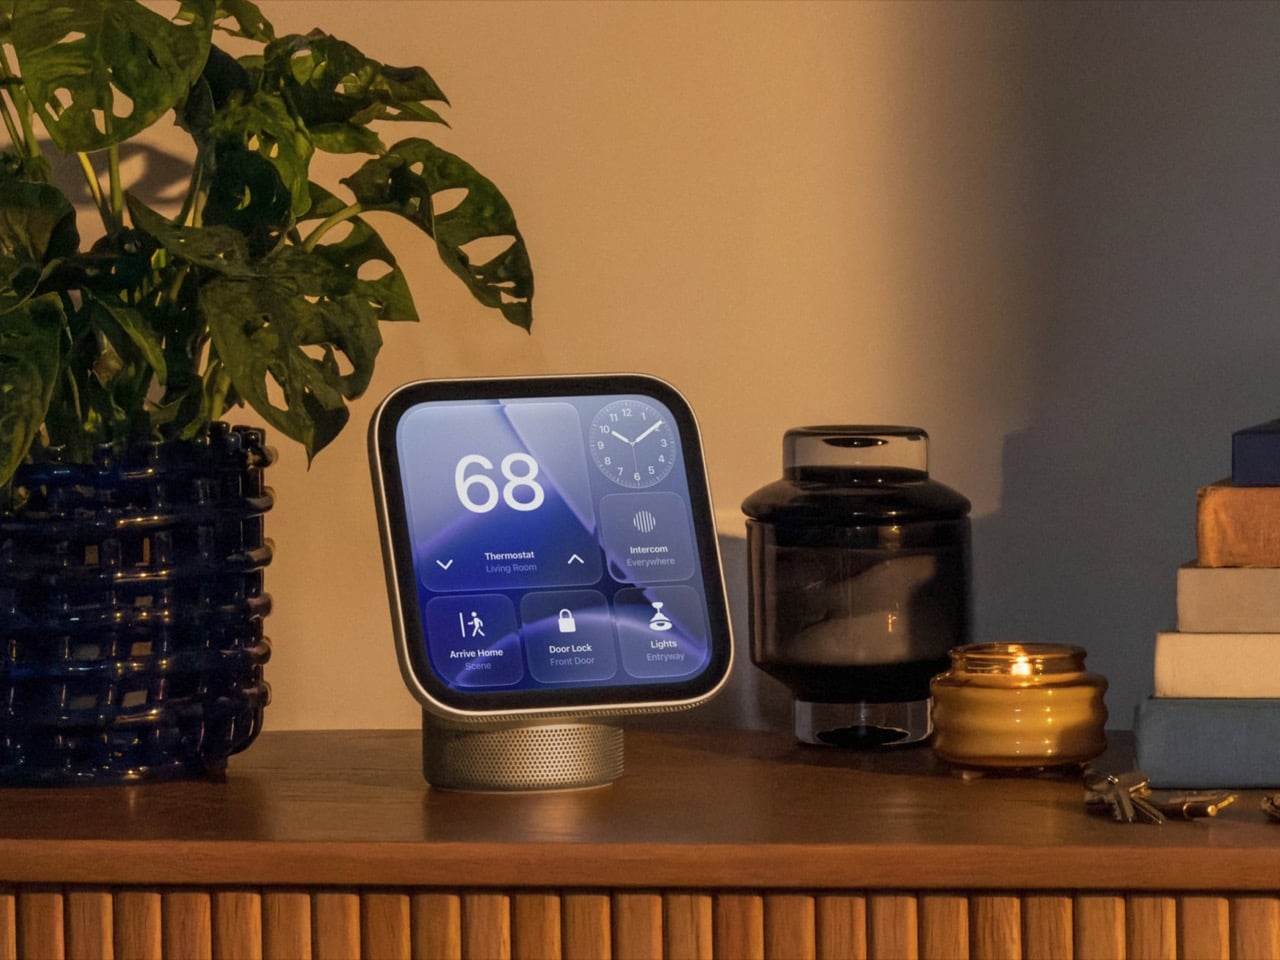
Line up the lock, camera, thermostat, and doorbell from Apple’s photo and the family resemblance is hard to miss. The Smart Deadbolt pairs a black glass keypad with a pill-shaped aluminum plate, and the Video Doorbell is an aluminum column capped in black glass. The Indoor Cam’s round head swivels on a chrome pivot that echoes the hinge on HomeView. The big 68 on the thermostat belongs to Schneider, yet it shares the same soft rounded-square body. Two companies, one look.
The Indoor Cam physically tilts down to stop watching the moment the first person gets home, which is the friendliest privacy gesture I have seen on a camera. The doorbell carries a 2.5K front camera plus a 1080p lens aimed at the doorstep for packages. The deadbolt uses Ultra Wideband (a precise short-range radio) to unlock as you walk up with your iPhone or Apple Watch, and it keeps working without internet. Everything sets up with one tap on your iPhone. There is no extra app and no extra account.
Ternus Ships What Is Ready Instead of Waiting for Perfect
Cook’s way was to wait until Apple could do it perfectly, and the home hub paid for it, slipping from spring 2025 while Siri caught up. Ternus, per Bloomberg, wants Apple to ship faster, experiment more, and spread launches through the year instead of two big events. HomeView still waited for Siri AI, so the rulebook did not change overnight. What changed is that the wait no longer stalls everything around it. The doorbell, lock, cameras, and thermostats are ready now, and Apple is shipping them.
The Home Collection starts at $39.95 for a sensor, with the lock at $349.95 and the floodlight cam topping out at $399.95. It arrives in December in the U.S. and Canada, the cameras and doorbell are also heading to the UK, and select items slip to early 2027. You can see the full lineup in Apple’s Home Collection announcement. Cook’s Apple was the friend who showed up late with the best snacks. Ternus’s Apple shows up on time, brings the snacks, and even has gluten-free options because he listened to his audience.
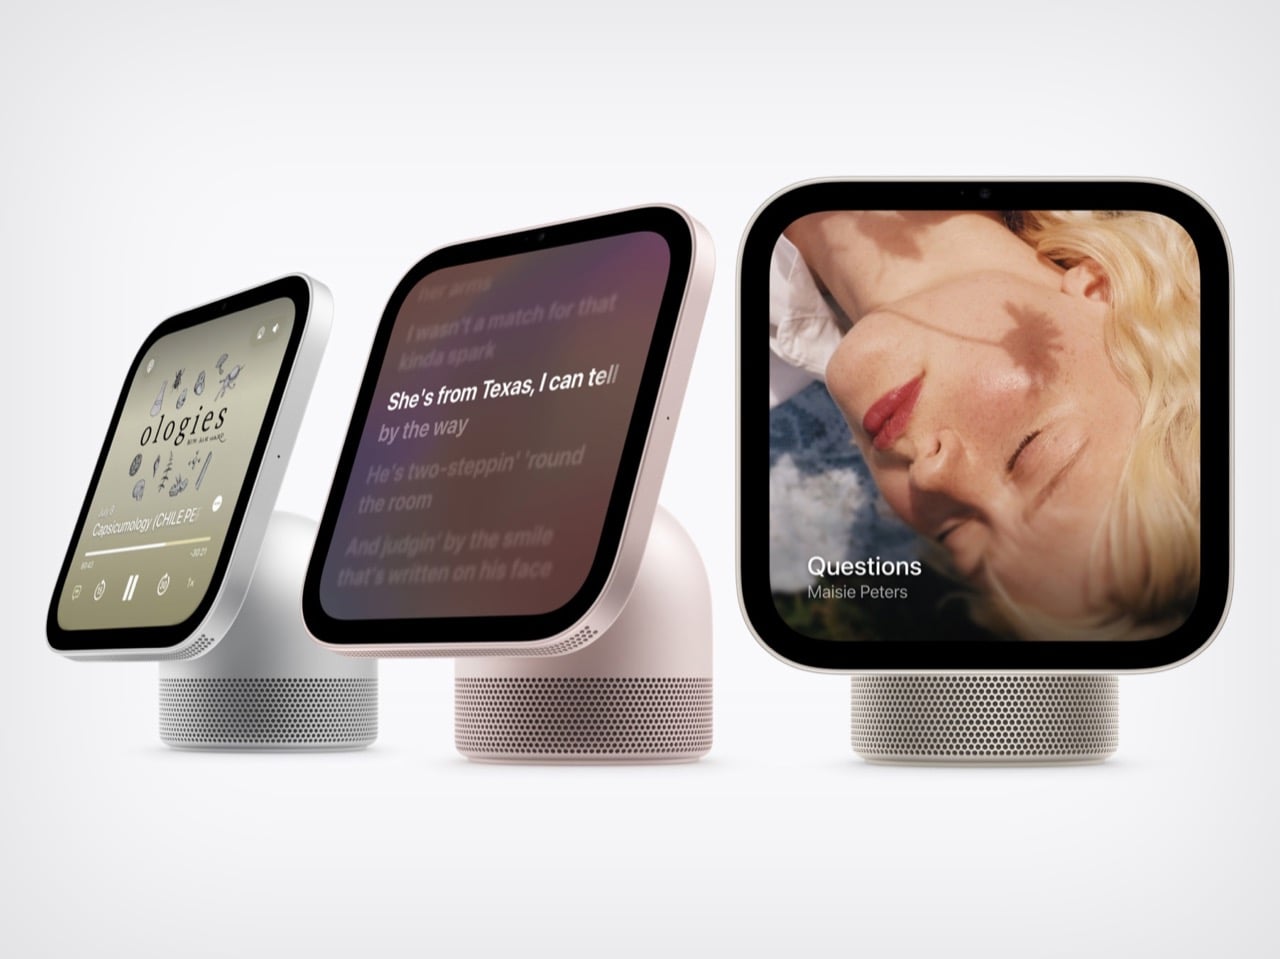
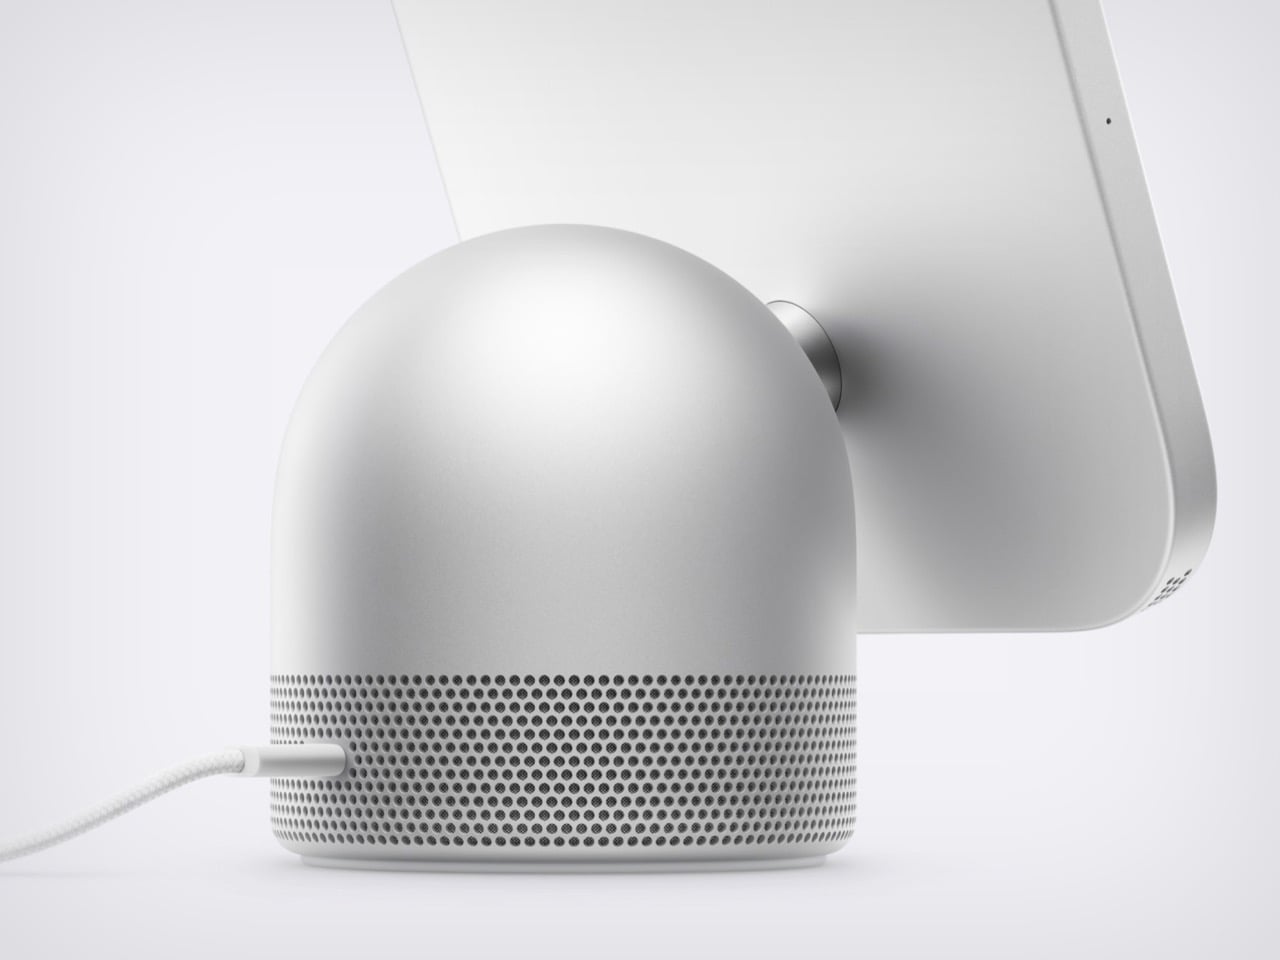
Apple’s design team apparently raided four different family albums and stitched the best bits into one object. HomeView has the iMac G4’s floating-screen silhouette, Apple Watch-style faces, the iPad’s slab of glass, and a speaker base that recalls the HomePod. I have a soft spot for that sunflower-lamp iMac, so seeing a dome and a tilting display make a comeback in 2026 made me unreasonably happy. Somehow the pile of parts works visually. It looks like a lamp, has a tablet’s touchscreen, and doubles as a speaker.
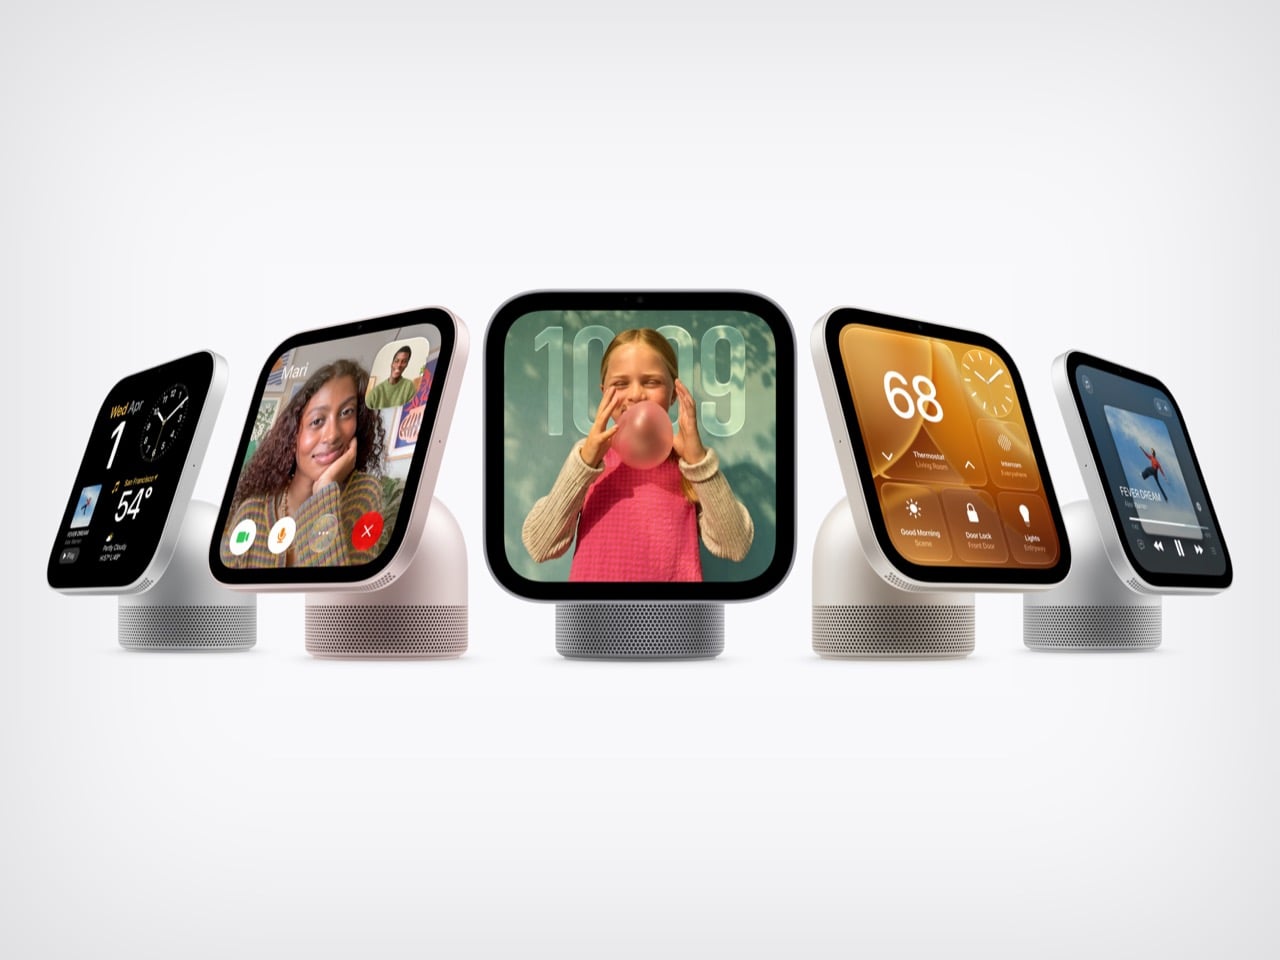
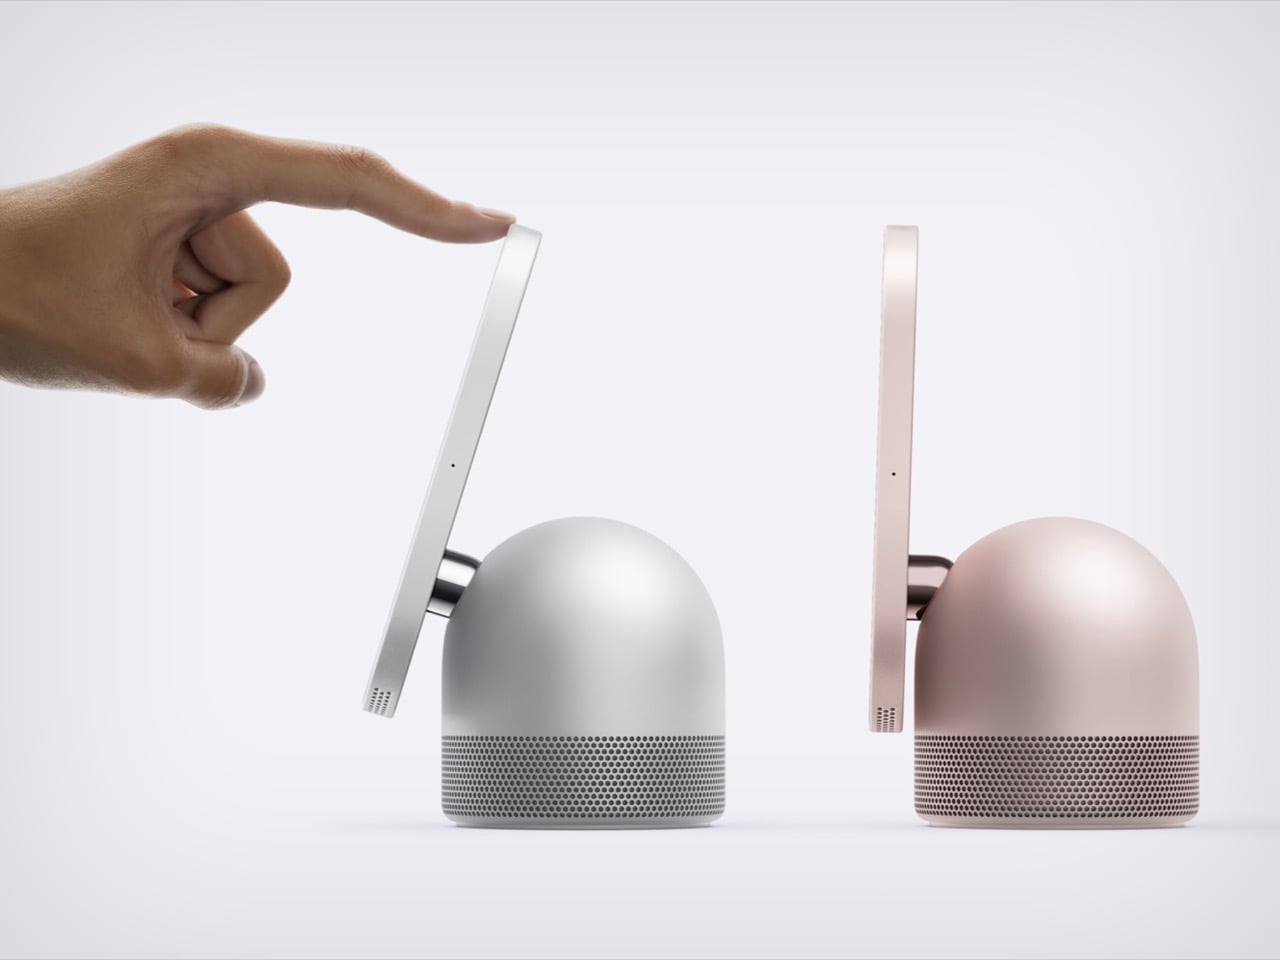
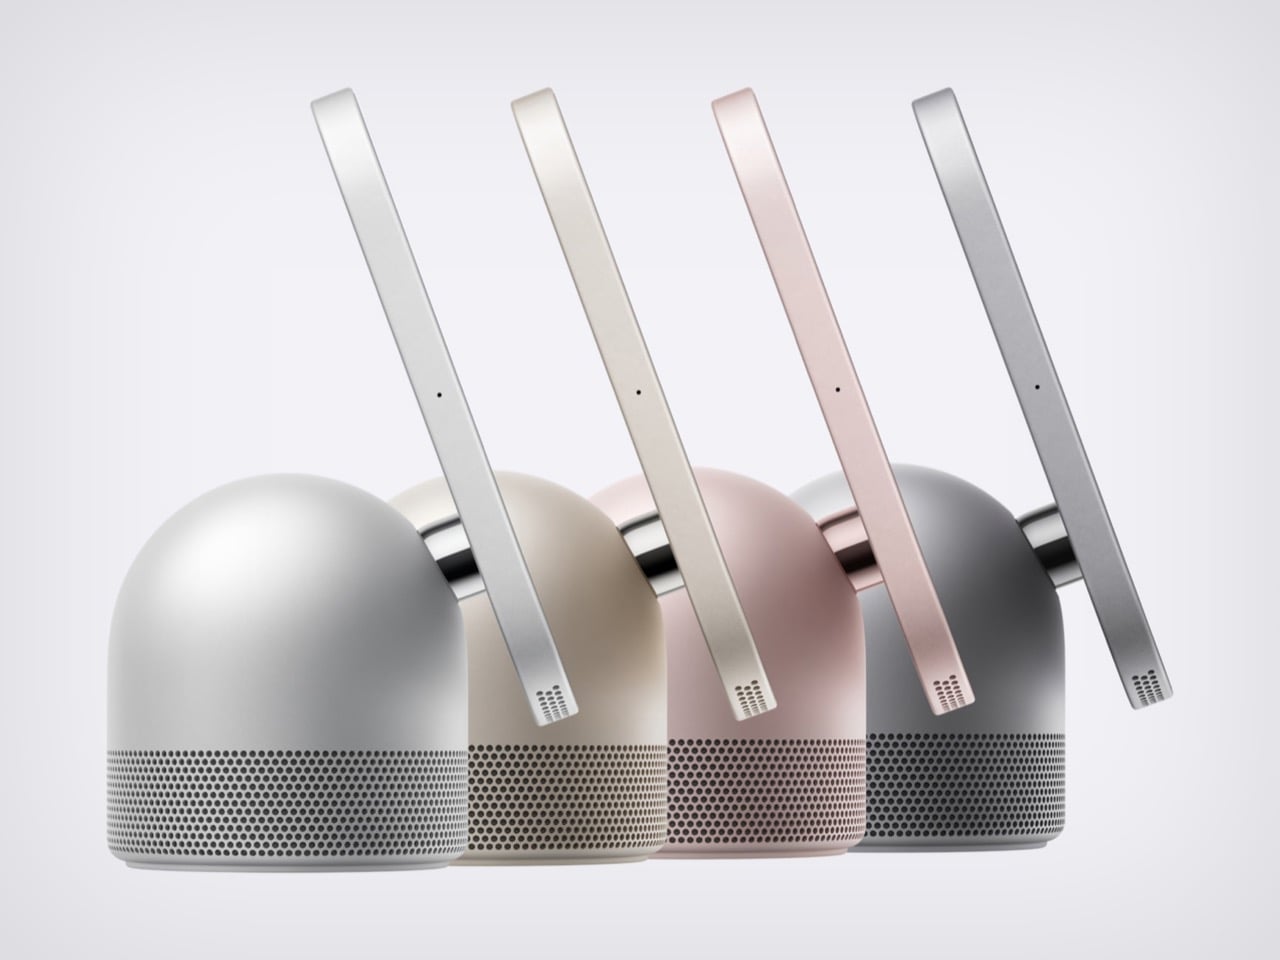
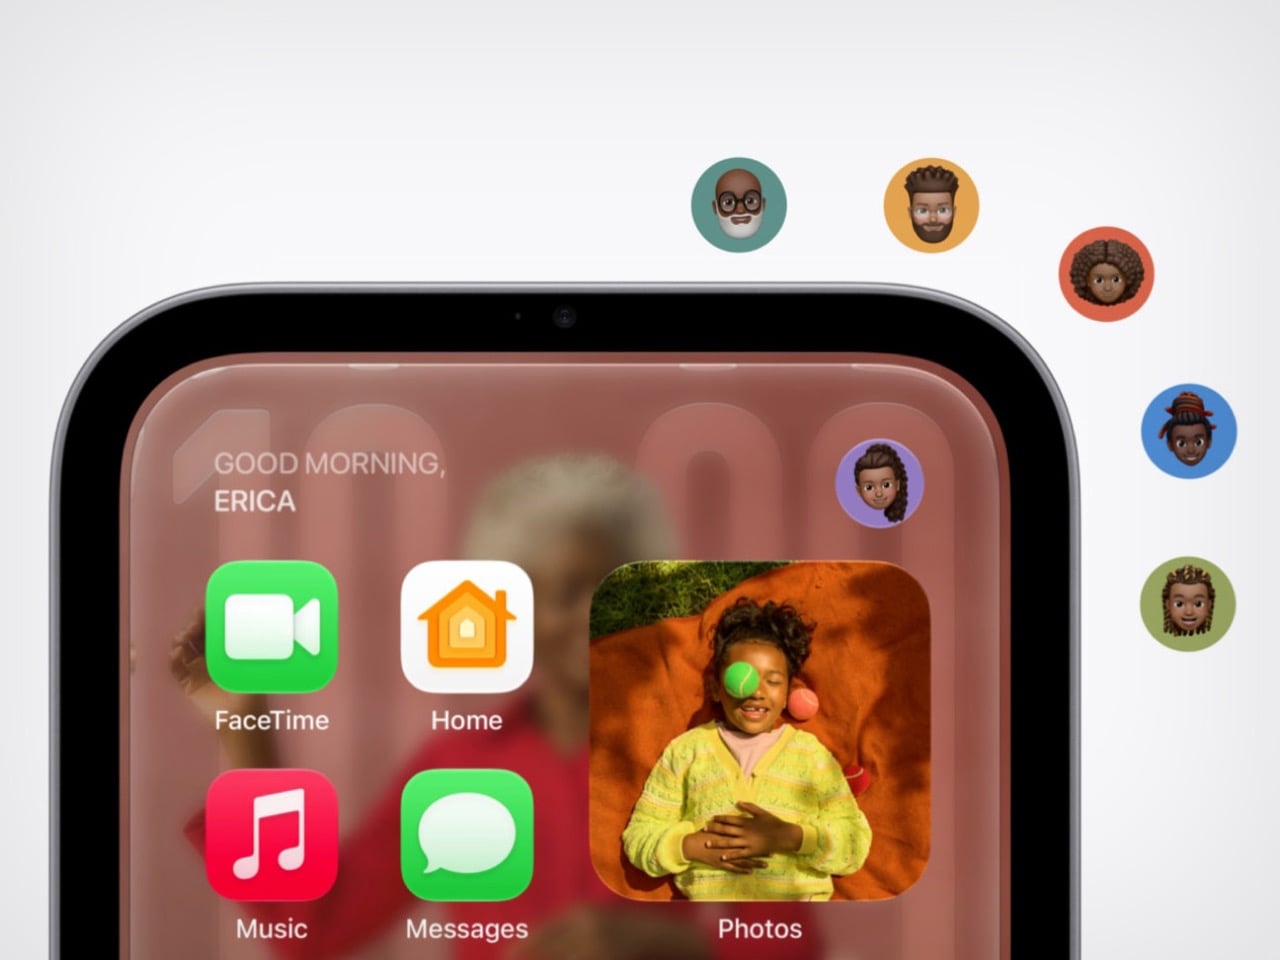
Apple announced HomeView on October 13, 2026. It pairs a 7-inch Liquid Retina screen with a domed aluminum speaker base and a stainless steel hinge that lets you tilt the display. An A18 chip and the rebuilt Siri AI run the show, and Apple says it recognizes up to six enrolled users, each with a personalized experience. A wall-mounted version offers the same screen and core functions, though its speaker hardware differs. Both models cost $299 in the U.S., with preorders open and availability scheduled for November 13, 2026.
The iMac G4’s Dome and Personality Make a Comeback
The iMac G4 arrived in January 2002 with a 15-inch flat panel hovering over its base. Its sunflower-inspired form emerged from Steve Jobs and Jony Ive’s design discussions; Walter Isaacson’s account credits Ive with suggesting that the screen be separated from the base like a sunflower. HomeView echoes that silhouette but swaps the long swinging arm for a compact hinge, which suits a counter where nobody wants a lamp neck knocking over the olive oil. The tilt adjustment gives you some latitude on a low nightstand or a tall kitchen island.
The G4 showed how much personality a computer’s shape could carry. HomeView’s similar stance makes a box packed with a camera and microphones look friendlier, at least to my eye. A dome with a head-on-neck posture reads more like a desk pet than a gadget, which is a handy trick for something that recognizes faces. The thick black bezel is a taste call I’m happy to defend: it gives the Photos face a proper picture-frame border.
Apple Watch-Style Faces and iPad Glass Decide What You See
The screen looks like it comes from the iPad side of the family: a square slab of glass with rounded corners and a front camera for FaceTime. Center Stage adjusts the framing as people move or join the call. Apple lists a brightness range from 500 nits down to 0.3 nits, allowing the display to dim substantially at bedtime. True Tone adjusts the white balance to ambient lighting. Selected interface elements also respond to your distance, showing simpler information across the room and more detail as you approach.
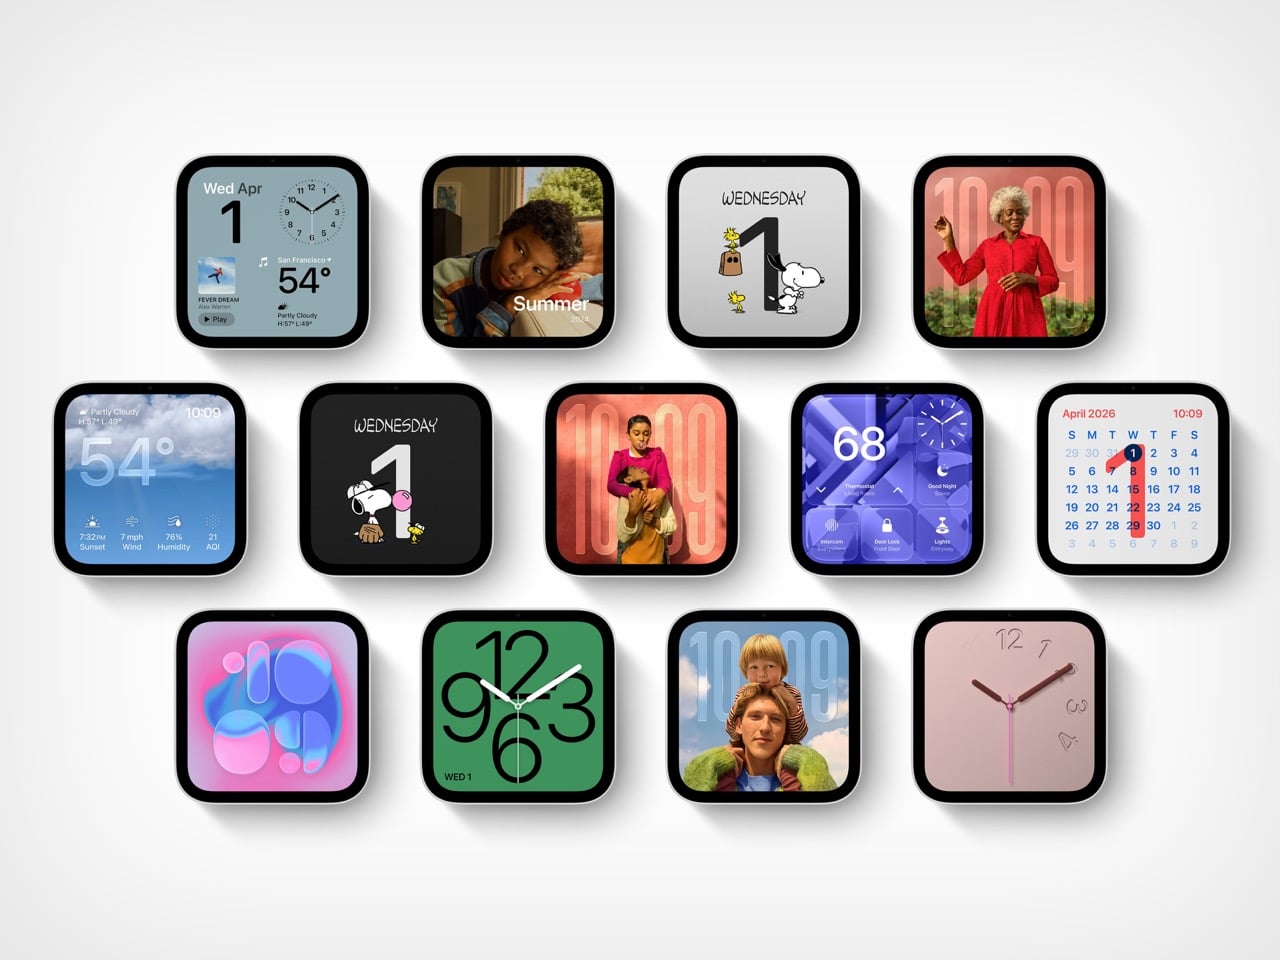
The faces feel distinctly Apple Watch-like. Photos offers Portrait-style depth effects, while Flow reacts to movement in the room. Snoopy’s animations respond to the time of day, weather, and sporting events, a very Watch way of being useful and adorable at once. Home Modular puts favorite accessories on one dashboard, and Home Camera can stream up to nine video feeds at once. Fan designers were exploring this territory years ago. Justin Latham’s HomePod Nano concept, which we covered in 2023, imagined a speaker with a display running a proposed watchOS fork. It was a fan concept, not an Apple product or working software announcement. HomeView’s Live Activities surface the current song, an active timer, or an incoming Intercom message, bringing that glance-and-go logic to a household screen.
The Speaker Base Does the Heavy Lifting
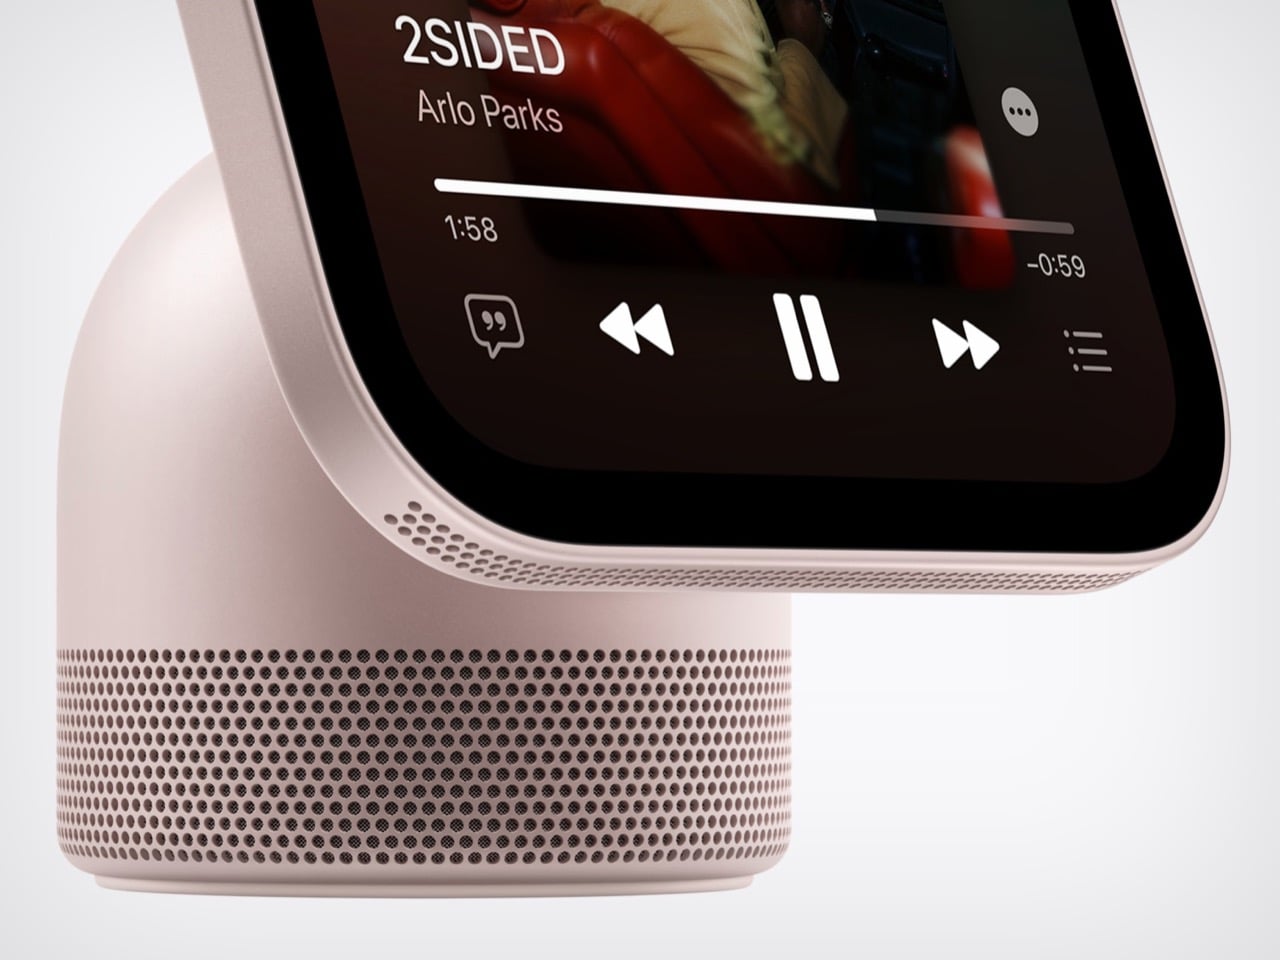
The base recalls the HomePod, although Apple’s images show a perforated, color-matched exterior rather than the HomePod’s fabric mesh. Small grille holes also run along the display’s lower edge. A down-firing woofer and two force-cancelling passive radiators sit in the base, while two full-range drivers occupy the display.Apple says computational audio uses its silicon and onboard sensors to adjust loudness and bass response in real time. The wall-mounted model has two full-range drivers but no base-mounted woofer or passive radiators, so the two versions shouldn’t be treated as acoustically identical. HomeView supports multiroom audio alongside HomePod, HomePod mini, and AirPlay-compatible speakers. Intercom also reaches HomeView and HomePod speakers elsewhere in the house.
The original HomePod was announced in 2017 at $349, when we dubbed it Apple’s “tune-busting Fabergé Egg.” Against that historical price, $299 for a speaker, screen, camera, and face recognition looks tempting on paper. You can pre-order HomeView on Apple’s site now, with both the tabletop and wall-mounted models arriving November 13. The tabletop unit ships with a color-matched USB-C cable, while the wall version relies on Schneider Home’s power mounts, which start at $59.95 and are sold separately. Siri AI launches in beta and in English, and Apple is not selling HomeView in the EU for now. Every ancestor in this object was Apple’s bet on a different decade, and HomeView is the first time they all share one counter.
Apple has a long habit of handing last year’s brain to this year’s regular iPhone. The iPhone 15 shipped with the A16 chip while the 15 Pro got the shiny new A17 Pro, and nobody stormed Cupertino with pitchforks. It works because people shop for cameras and battery life, and nobody has ever asked a store clerk about die size. The iPhone 18 is about to run the same play with a twist. This time the regular model gets a brand new A20 chip, except it arrives months after everyone else’s.
The chip is the A20, and a leaked solder ball map analyzed on Weibo by user 白饭炒白米饭 (reported by Notebookcheck on October 1) suggests it is a slimmed down sibling of the A20 Pro. That Pro chip already powers the iPhone 18 Pro, starting at $1,199, and the iPhone Duo, starting at $1,999. Both reportedly use TSMC’s 2nm process, but the standard version supposedly keeps the AI hardware and trims the GPU, cache, and clock speeds. The base iPhone 18 is expected in spring 2027, and Apple has announced no price or date. So what does Apple cut when it wants a cheaper 2nm chip, and what does it refuse to touch?
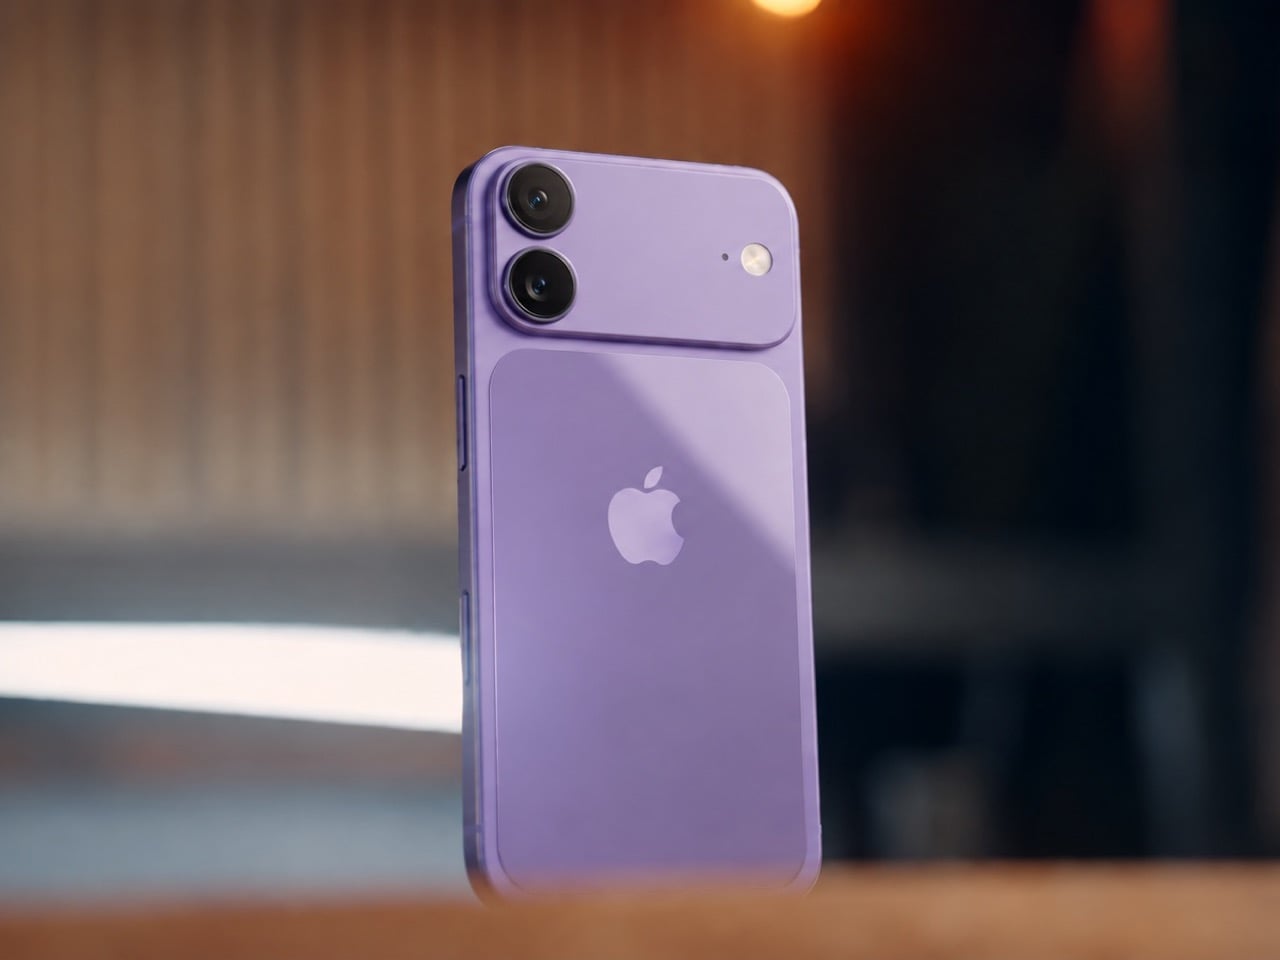
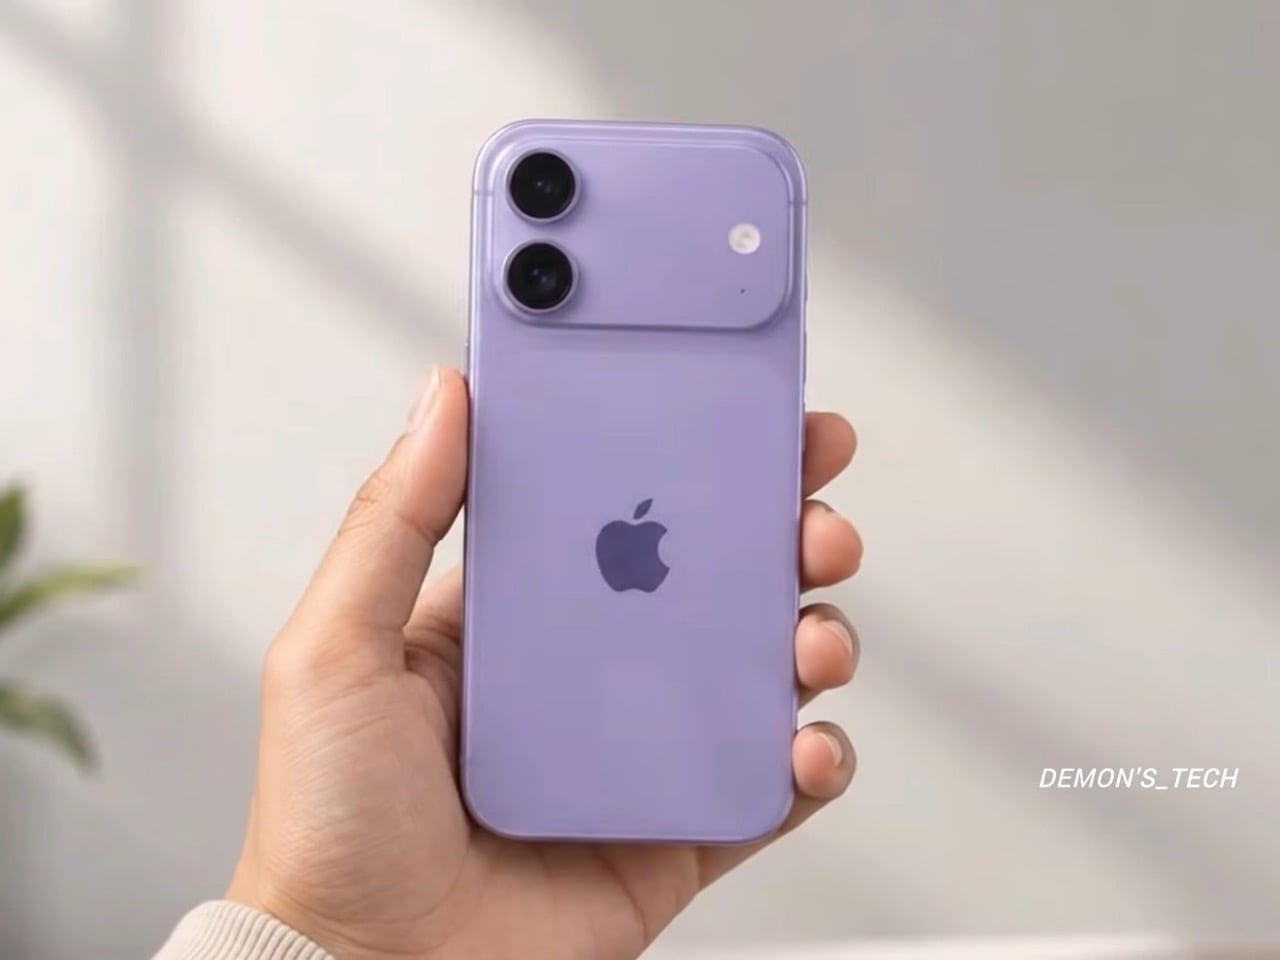
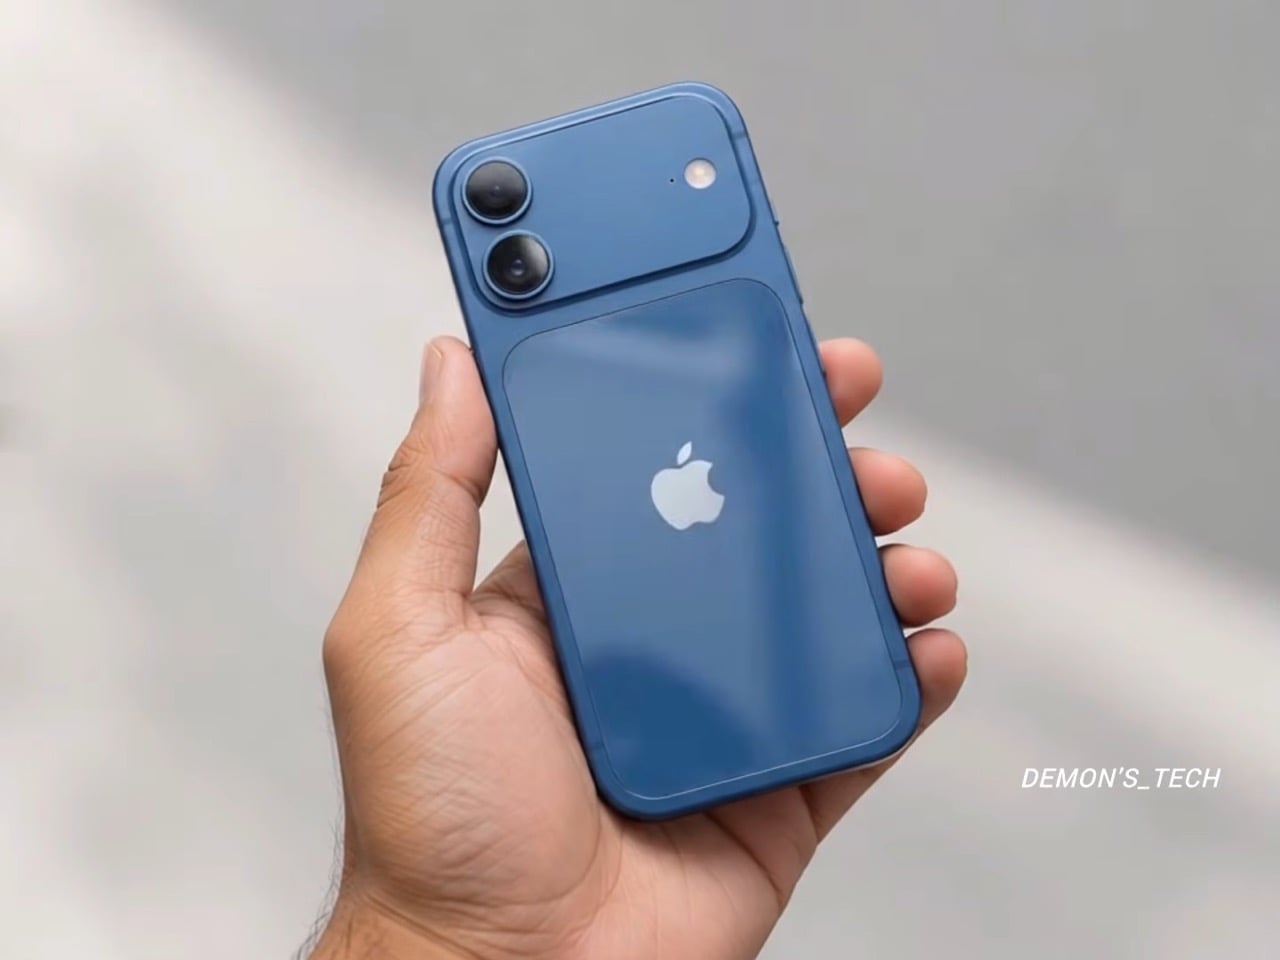
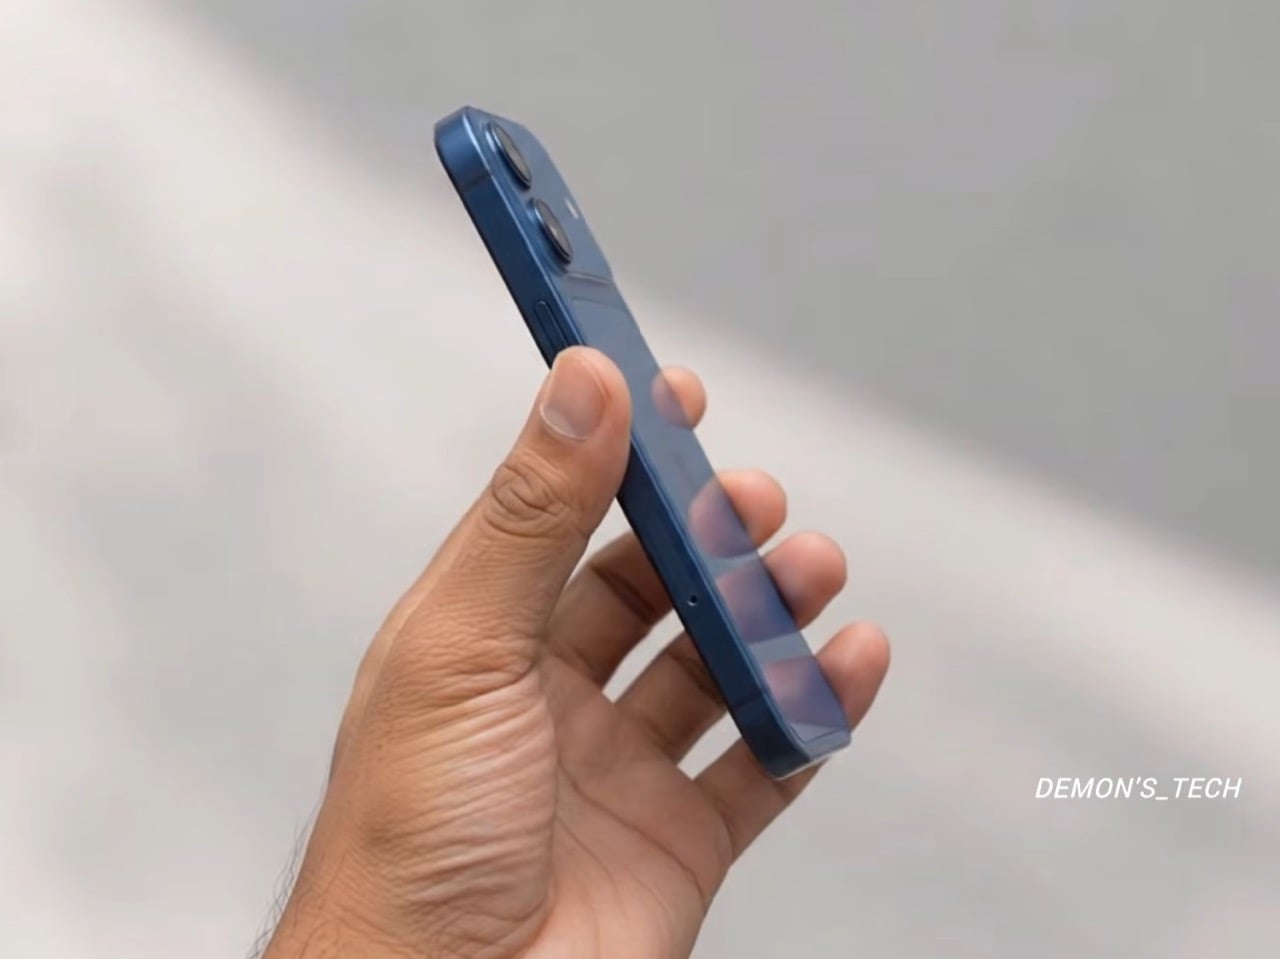
Designer: Demon’s Tech
A Smaller Die Than Last Year’s Chip, on a Pricier 2nm Node
The standard A20’s bare die is estimated at 70 to 80 mm², which would make it smaller than the A19 at 82.8 mm² and well under the A20 Pro’s 98.8 mm². A die is the actual slab of silicon, and every square millimeter you shave off means more chips per wafer and a lower bill. On 2nm the savings count for more, since Notebookcheck’s report notes those wafers cost significantly more than earlier nodes. Our own look at the base iPhone 18 pegged its body as basically an iPhone 17 in disguise, so there is no fresh industrial design to pay for either. Apple looks to be spending the budget on silicon instead.
Apple reportedly gets there by halving the cache. The standard A20 is expected to carry 8 MB of L2 cache for its two super cores and 4 MB for its four efficiency cores, which is 50% less than the A20 Pro. Cache is the small, ultra fast memory sitting right next to the processor cores, so a smaller helping can mean slightly more trips out to slower memory under heavy load. It is also one of the most direct ways to shrink a die, because SRAM, the circuitry cache is built from, has scaled poorly on recent chip nodes. Honestly, it is the smartest corner to trim, since you will never see a cache spec on a phone box.
Why the A20 Pro Gets Fancy Packaging and the A20 Skips It
The A20 Pro reportedly uses WMCM, short for wafer-level multi-chip module, which places the processor and its memory side by side instead of stacking one on the other. That layout lets the chip connect straight to the vapor chamber, the cooling plate Apple introduced with the iPhone 17 Pro. Apple says the new Pro design delivers up to 40% better sustained performance than the 17 Pro. The standard A20 is expected to stay with traditional package-on-package, where the memory sits on top of the chip like a hat. A hat is cheap and compact, but it also traps heat right where you do not want it.
Packaging is how Apple reportedly gets the A20 Pro to 4.93 GHz, a figure from the leak analysis that Apple has never confirmed. The standard A20 is expected to clock considerably lower, so it likely does not need the same cooling tricks. Pair that with an expected 5-core GPU against the Pro’s 7 cores, and the gap could show up in a long gaming session. Past base chips trailed their Pro siblings by one GPU core, so a two-core deficit would be wider than usual. The vapor chamber stole the show in the iPhone 17 Pro teardown we covered, and the leak says nothing about the base model getting similar cooling.
The AI Hardware Apple Keeps, and What Spring 2027 Looks Like
The AI side of the chip reportedly survives the cuts largely intact. The leak says the A20 keeps the same dual 16-core Neural Engine as the Pro, the dedicated block that handles on-device AI tasks, along with its own 4 MB cache. The system-level cache, a shared pool of memory every part of the chip can tap, may grow from the A19’s 12 MB to 16 MB. The memory bus is also expected to widen to 96 bits, matching the Pro, which means more data can flow to the chip per second. In real life that means live translation and photo cleanup running on the phone instead of waiting on a server.
The iPhone Duo (the one with the open and close animation we gushed over) runs the same A20 Pro, so Apple’s fall lineup now shares one chip. The base model is expected to follow in spring 2027 with a lighter version of that platform. Apple has confirmed no date, price, or chip for it, so every number here is a leak. The iPhone 17 started at $799 and the Pros just rose $100, so the base model’s price is the number to watch. Back in the A16 days the hand-me-down chip was a consolation prize, but this time the regular iPhone gets a fresh 2nm brain with a little muscle trimmed, a deal I would happily take.
Mise à jour du 8 octobre 2026 : depuis la publication de cet article, j'ai découvert les idées que diffuse DHH, le créateur d'Omarchy. Je ne recommande plus cette distribution, et je vous explique pourquoi dans
Omarchy, non merci
.
Omarchy-apple-dev
, c'est un projet qui vous permet de compiler une app codée en SwiftUI, l'installer sur votre iPhone via le cable USB et l'envoyer à TestFlight d'Apple, tout ça depuis une machine Linux sous Omarchy... Oui oui, sans Mac !
Le gros du boulot est assuré par
xtool
, qui sait déjà compiler, signer et installer une app iOS sous Linux, mais ce dépôt omarchy-apple-dev y ajoute un script ship.sh, qui permet de créer le .ipa, d'y renseigner les clés de build que le traitement App Store lit, puis d'envoyer tout ça à Apple comme un grand.
Bref, en langage clair, ça veut dire que vous pouvez être développeur iOS depuis votre PC Linux. Cool hein ?
Pour l'installer, c'est juste 3 lignes avec install du SDK d'Apple.
Les morceaux du SDK iOS n'existant que dans la distribution Xcode d'Apple, il faut donc télécharger le Xcode.xip sur developer.apple.com avec un Apple ID gratuit, depuis n'importe quel OS. Vous relancez ensuite le script avec XCODE_XIP=/chemin/Xcode.xip, puis device-run.sh installera l'app sur l'iPhone branché. Un compte gratuit suffit pour ça, mais Apple le limite à 3 apps par appareil avec des profils qui expirent au bout de 7 jours. Pour TestFlight, il faudra par contre un compte développeur payant et une clé d'API App Store Connect.
Après, les CGU d'Apple pour Xcode et ses SDK disent bien que ces logiciels ne sont autorisés uniquement sur un produit de marque Apple tournant sous macOS, et que tout autre usage est une violation du contrat. Sa clause 2.5 interdit aussi d'utiliser les SDK séparément ou de les faire tourner sur du matériel qui n'est pas Apple. Or le SDK que le script installe vient forcément d'un Xcode d'Apple. Voilà, au moins vous savez...
Bref, pour bricoler sur votre iPhone avec un compte gratuit, ça peut le faire... Après, pour l'App Store, sachez qu'Apple exige en plus depuis avril dernier, que vos apps soient compilées avec Xcode 26 ou plus récente alors qu'ici, ce bon vieux script contourne ça... Donc à voir si vous voulez tenter votre chance.
Au pire, pour la phase finale (la compilation de la release de votre app), vous sortez un Mac rien que pour ça et le reste du temps, vous codez et compilez vos tests à 100% dans Omarchy. A vous de voir :)
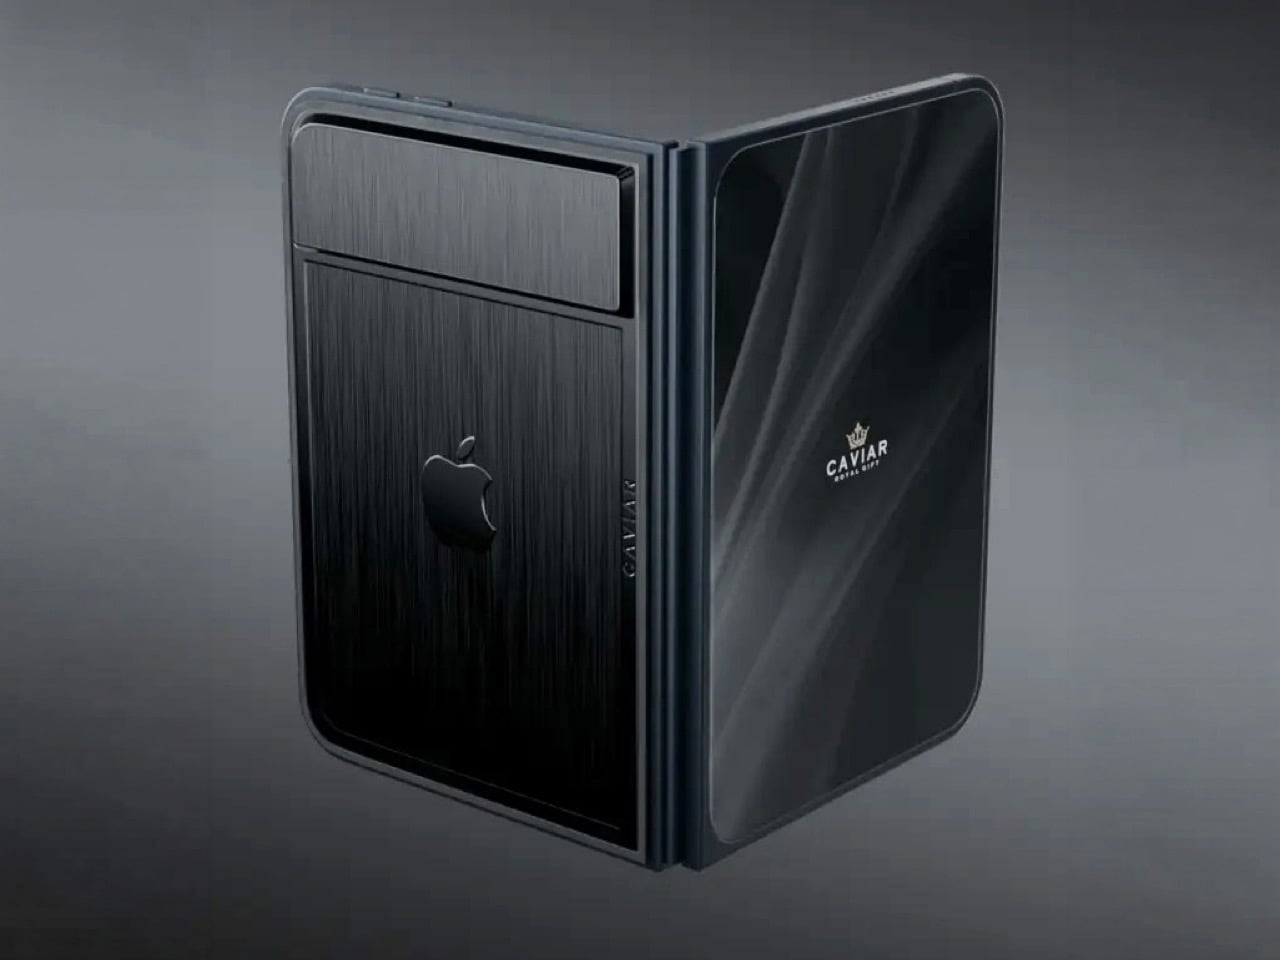
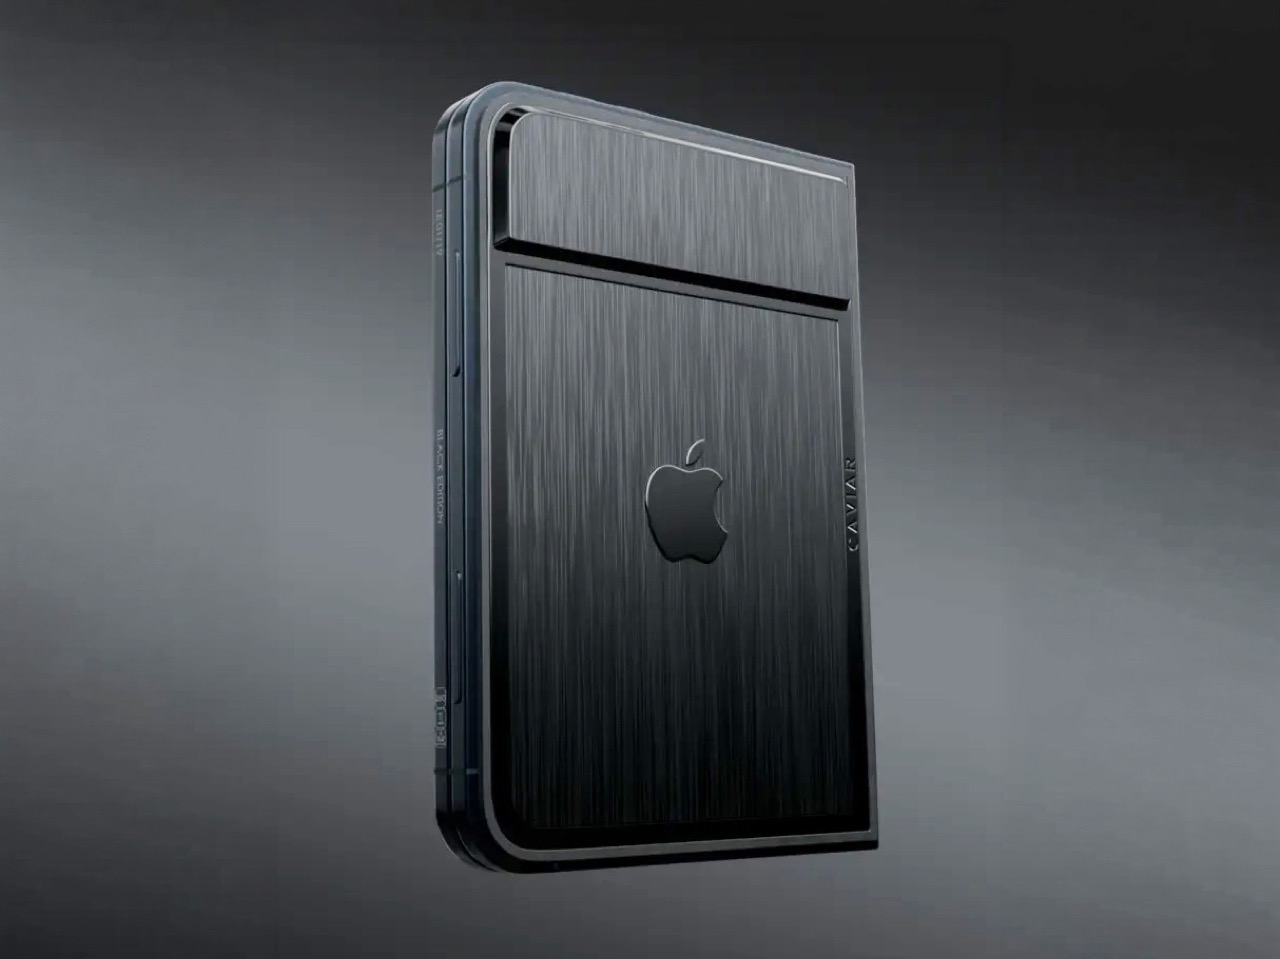
Imagine sitting at a table with friends and whipping your phone out. Your friends see it’s a foldable… then as you unfold it, the animation looks suspiciously like the iPhone Duo. Your friends are impressed, they designate you as the group photo taker… and you tell them regrettably that your iPhone Duo has no cameras. Then you add… not only does it not sport any cameras, it also costs fourteen grand.
To be honest, that scenario is entirely imaginary. Mainly for a bunch of key reasons. Caviar built this version of the iPhone Duo for privacy, championing what they call “Privacy, Minimalism, and a Refined Masculine Style.” Someone who sees truth in that ethos isn’t designated photographer material. And if they were, shelling 14k on a phone means you probably have a few extra grand to hire a photographer wherever you go. The only reason someone buys this hare-brained version of the iPhone Duo is because they can. Plain and simple.
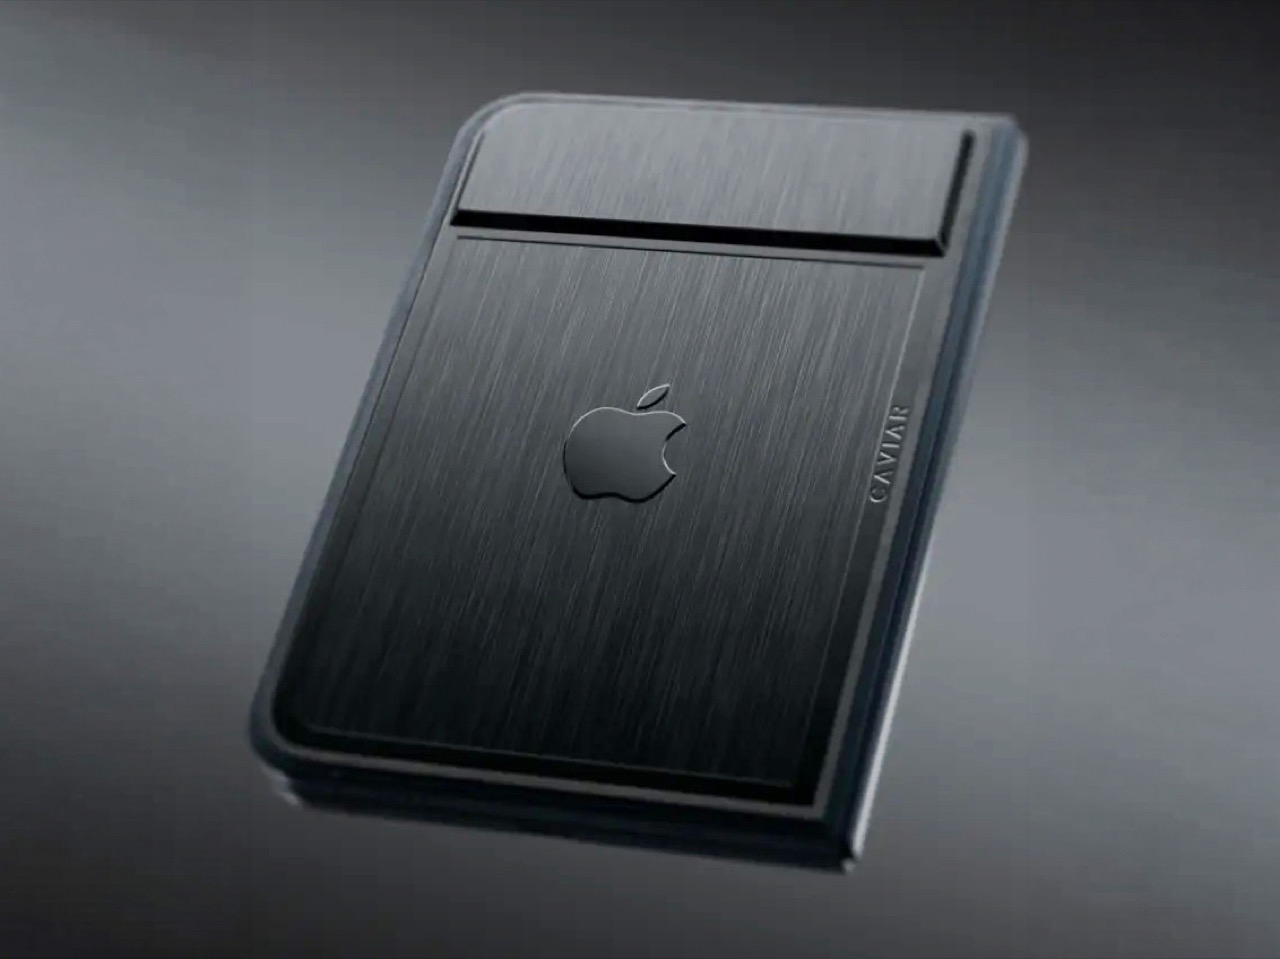
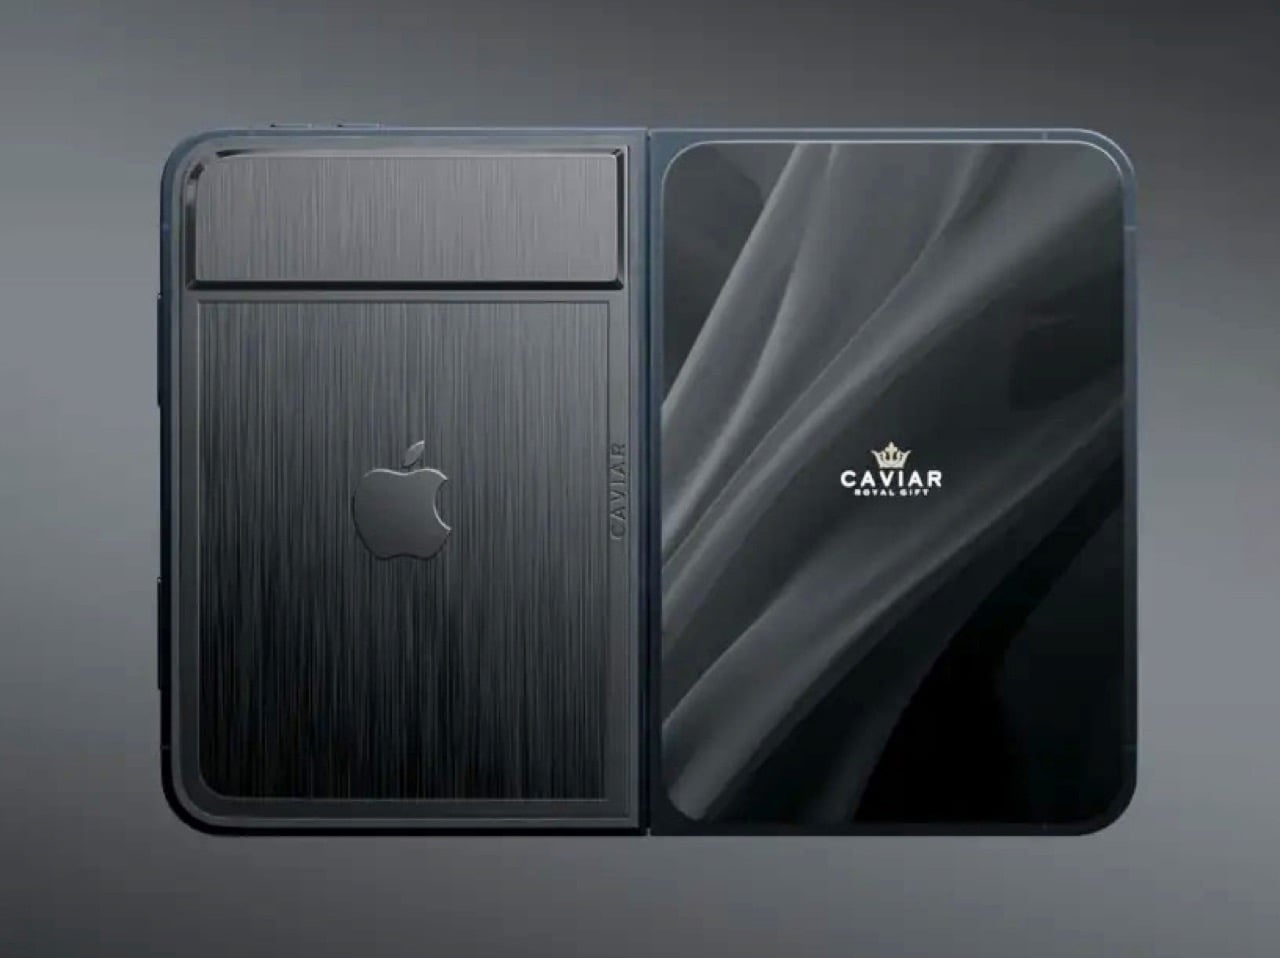
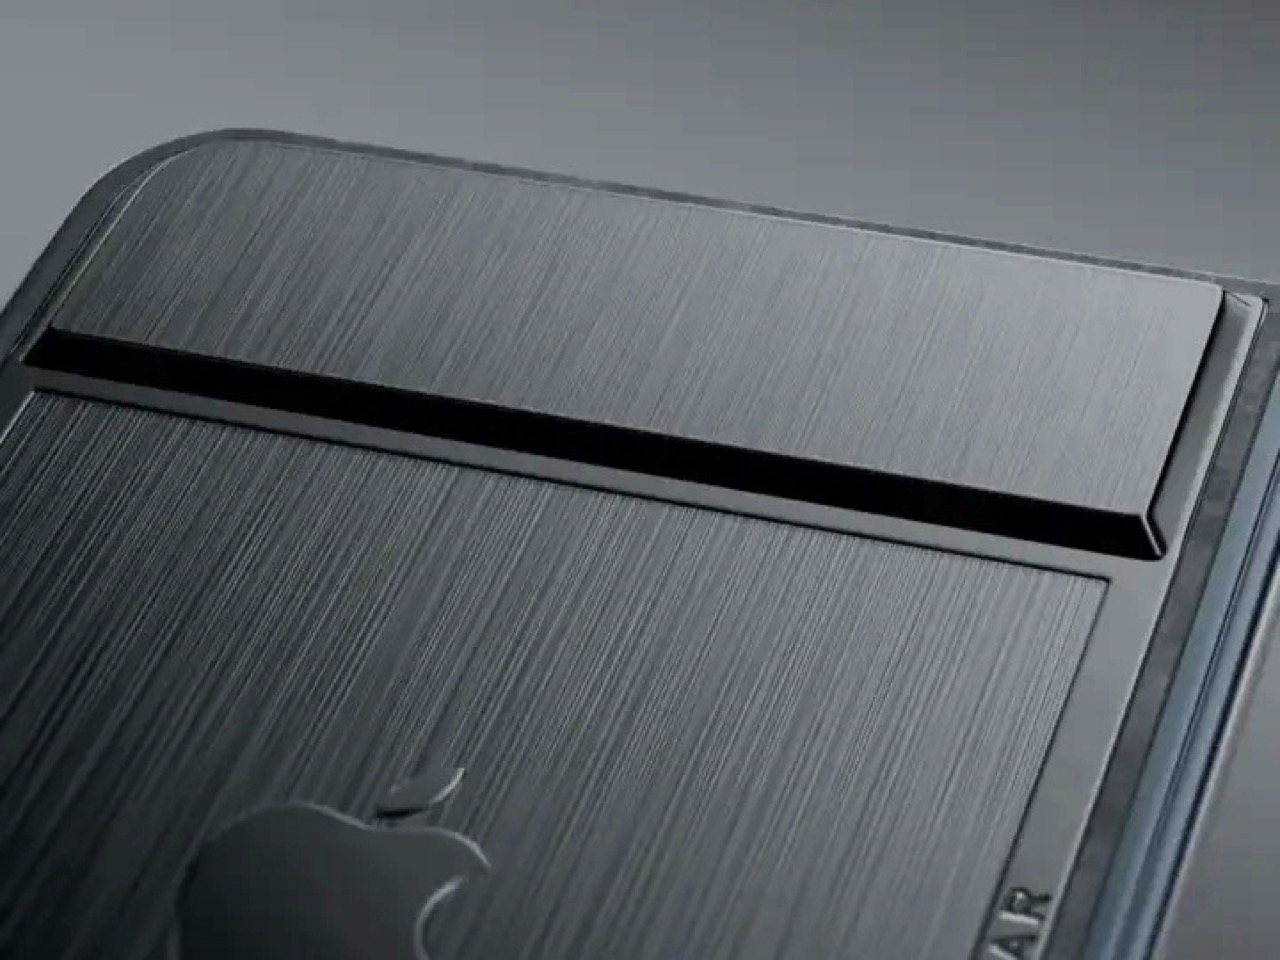
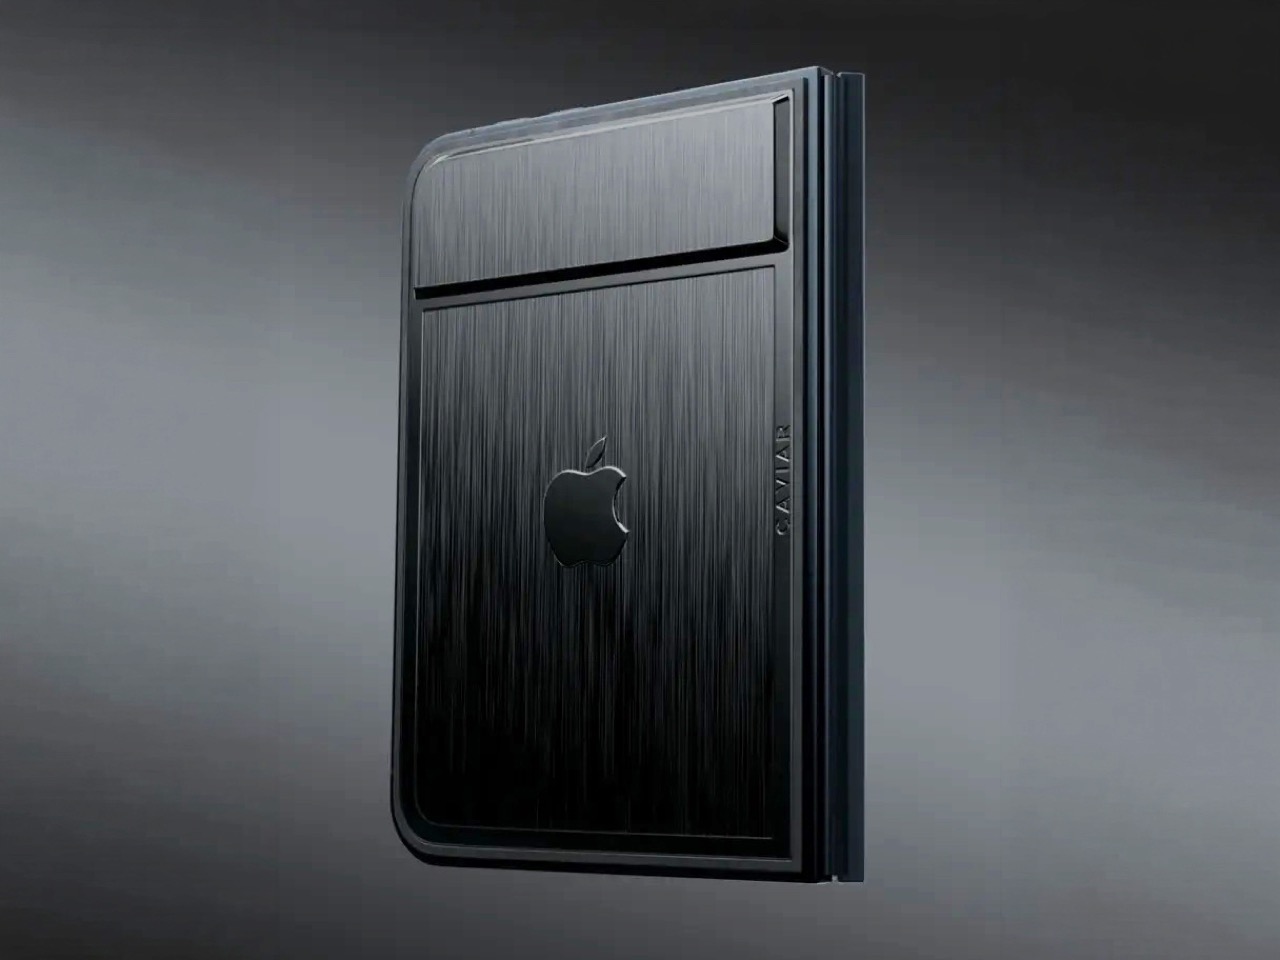
Removing the camera stack from the back of the iPhone Duo does something unexpected: the phone becomes genuinely beautiful. That rear panel, normally dominated by the triple-lens module, turns into a single flat sheet of satin-finished black titanium. No bumps, no rings, no glass circles competing for visual real estate, just one uninterrupted surface that shifts character depending on the light hitting it. Caviar calls the inspiration “supersonic aviation aesthetics,” which sounds like marketing speak until you actually look at the product photos. A blacked-out Apple logo sits flush in the titanium, the Caviar crown marks the opposite panel in a swept fabric-like texture, and the whole thing looks less like a phone and more like a prop from a very expensive spy film.
Apple’s decision to use Touch ID for the iPhone Duo, abandoning Face ID, turns out to be what makes Caviar’s camera-free execution actually hold up. A Face ID phone needs its front camera array to function as a biometric sensor, so pulling that out would mean a very pretty device that cannot unlock. Touch ID lives in the frame rather than behind the screen, so Caviar could strip the entire camera stack, front hole-punch and rear module both, without breaking anything fundamental. Based on product images, the inner display on the Ultimate appears completely clean, no hole-punch interrupting the screen, which makes the inside as seamless as the outside. Two separate design decisions from two separate companies ended up fitting together better than either could have planned.
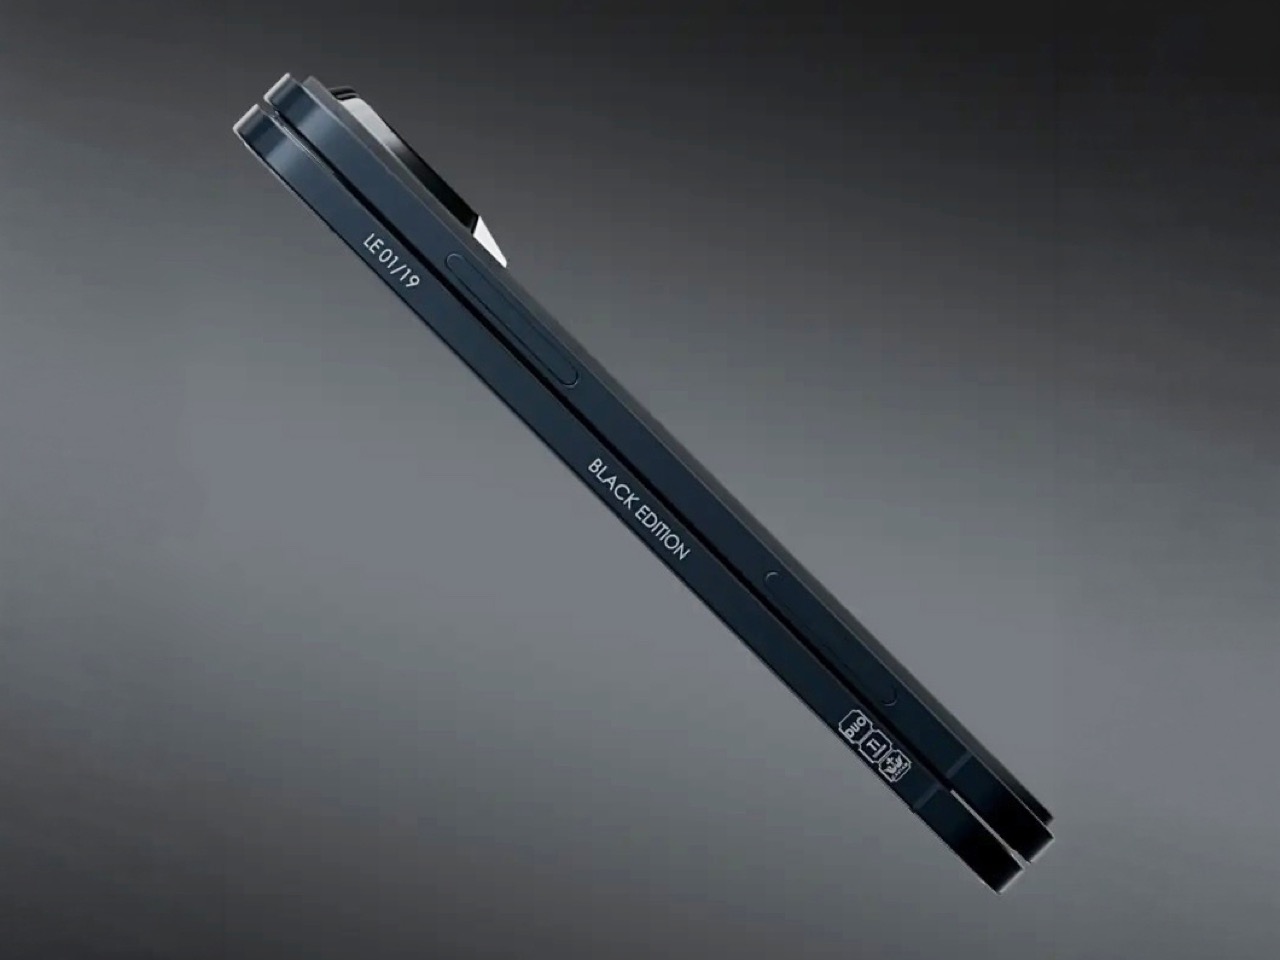
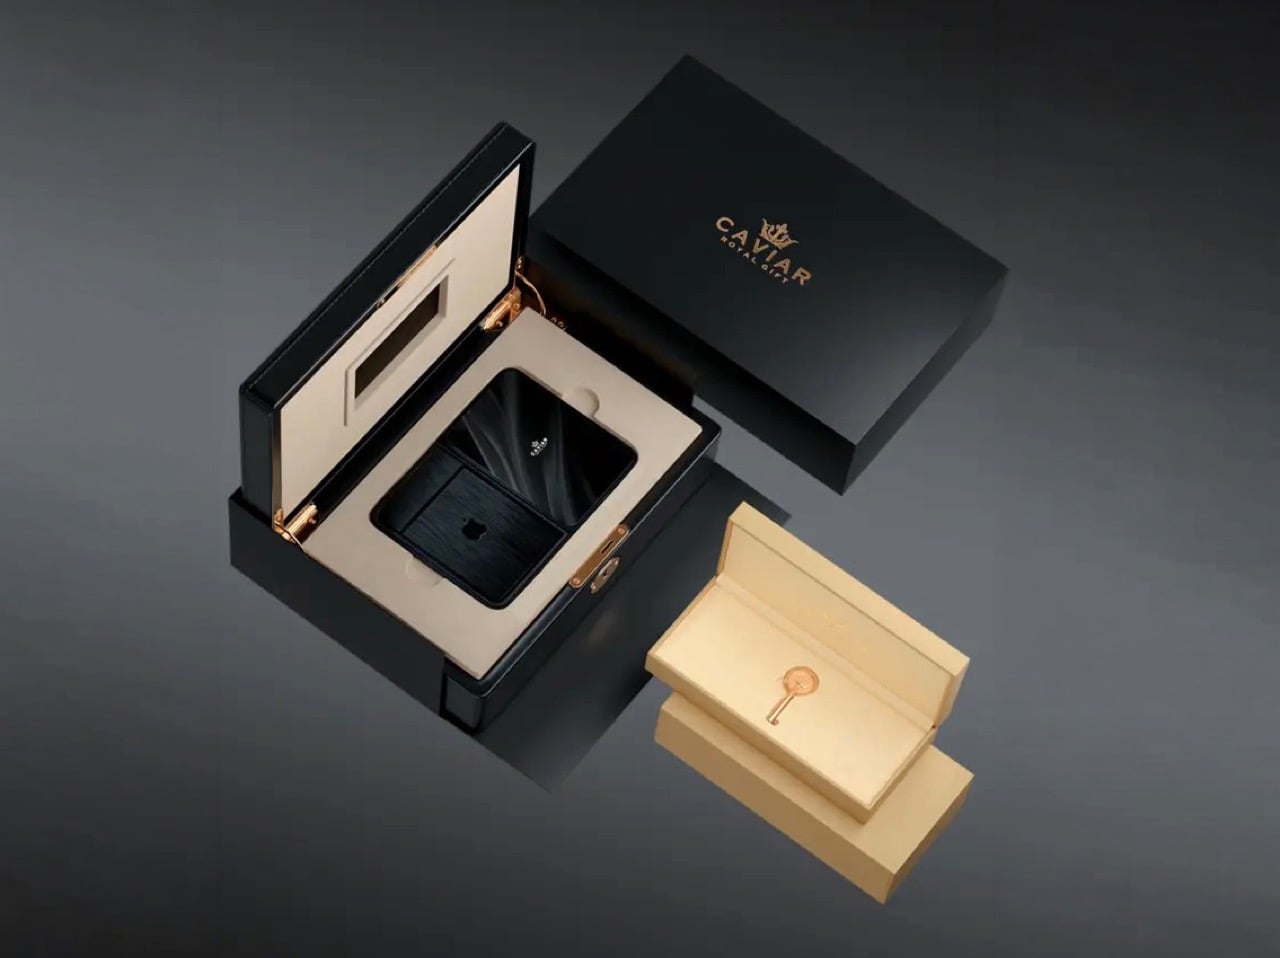
Caviar made 19 of these total. Each unit ships in a custom lockable black luxury box, presented the way a jeweler presents a watch rather than the way Apple ships a phone. A smaller gold-colored wooden case inside holds what appears to be a gold-plated commemorative coin, the kind of object that exists purely to make the unboxing feel like a ceremony. The side of the phone is engraved with a serial number too, for exclusivity. Caviar knows exactly who they are selling to, and made sure the packaging matches the energy.
Caviar has been doing this for years, taking flagship Apple hardware somewhere Apple would never go, for clients who appreciate the gesture. The formula is consistent: start with the most premium Apple product on the market, make it rarer, make it more dramatic, and let the price be the final statement. We have covered their gold-plated and titanium iPhone builds here before, and none of them committed this hard to stripping features as a form of self-expression. At $13,990 for 19 units (mind you, that’s just the 512GB variant), the Ultimate is the purest version of the Caviar argument: a phone that costs seven times its base price because it does less, and somehow makes that sound like the point.
AirCard
, c'est une appli macOS gratuite qui permet de remplacer l'image par défaut d'une carte dans Apple Wallet, directement depuis votre Mac relié à l'iPhone par un câble USB et tout ça sans jailbreak. Je l'ai essayée sur mon iPhone 16 Pro Max et ça marche du tonnerre. Attention quand même, l'appli n'a aucun bouton pour revenir en arrière, mais ne vous inquiétez pas je vais tout vous expliquer.
Ce tour de passe-passe nous vient d'AirLift, une faille du service AirTraffic, celui là même qui synchronise les médias d'un Mac vers iOS. Et
AirLift
s'en sert pour lire et écrire dans des dossiers qu'il n'est pas censé toucher, depuis un Mac déjà appairé avec l'iPhone. Cette petite vuln a été testée à partir de iOS 18.0, et Apple peut évidement la corriger quand elle veut mais ce serait quand même vraiment dommage parce que c'est bien cool. Maintenant rassurez vous, côté paiement, rien ne bouge ou n'est transféré ou créé. On ne change que l'image d'une carte du wallet c'est tout !
Je vous propose maintenant de rentrer dans le dur.
Installer AirCard et brancher l'iPhone
Il vous faut donc un Mac (Apple Silicon ou Intel), un iPhone, un câble USB qui transmet les données et une carte déjà ajoutée à Wallet. Téléchargez AirCard.dmg dans les releases du dépôt, ouvrez-le et glissez l'appli dans le dossier des Applications. Si macOS refuse de la lancer parce que l'éditeur est inconnu, faites un clic droit sur l'appli, Ouvrir, puis Ouvrir une seconde fois. Sinon, faut passer par
Sentinel
ou par cette commande qui retire le blocage :
Branchez l'iPhone au Mac en USB, déverrouillé, et acceptez de faire confiance à l'ordinateur. Dans AirCard, restez sur l'onglet Apple Wallet et cliquez sur Scan Cards. Sur l'iPhone, double-cliquez sur le bouton latéral et Apple Pay s'ouvrira comme quand vous faites un paiement, avec Face ID. Une fois authentifié, touchez la carte à relooker, et une deuxième fois si rien ne bouge. Ce geste permet en fait à AirCard de récupérer l'identifiant de la carte (un hash), et elle peut apparaître ensuite dans la fenêtre du Mac.
Si le scan ne trouve rien, ouvrez Log dans AirCard et cherchez "Connected to the unified device log stream". Relancez ensuite un scan, authentifiez-vous et touchez vraiment la carte, ou passez d'une carte à l'autre. Si ça bloque encore, débranchez, déverrouillez l'iPhone et rebranchez. Des utilisateurs disent sur le GitHub du projet que le scan ne détecte pas toutes les cartes voire aucune avec cette 1.2.5. Moi j'ai pas eu de problème mais il arrive parfois que iOS remplace certaines valeurs par "private", et le scanner ne peut alors pas les récupérer.
Choisir l'image et flasher
Ensuite, cliquez sur l'emplacement de la carte où il y a le symbole +, ou glissez-y directement une image. AirCard la recadre alors automatiquement en 1536 × 969 pixels bien centrée avec le ratio d'une carte. Cela veut dire que peu importe le design que vous voulez utiliser, gardez bien ce qui est important pour vous au centre de l'image. Ensuite cliquez sur Flash Skins et ça appliquera votre image sur votre carte dans Apple Wallet. Chez moi, l'opération a pris entre 30 secondes jusqu'à parfois 1 min (j'ai pas super chronométré non plus, hein) mais le flash est allé jusqu'au bout à chaque fois.
Ensuite quittez Wallet depuis le sélecteur d'apps et relancez-le, ou redémarrez carrément l'iPhone et hop, votre nouveau visuel de carte apparaîtra.
J'ai donc comme beaucoup commencé par un skin d'Amex Black, sans chichi sur l'une de mes CB, histoire de frimer...
Puis sur ma seconde CB, je me suis fait un skin de carte Vitale maison. Au départ, je me suis fait un PNG avec Pixelmator, tout ce qu'il y a de plus normal avec la bonne taille et tout et tout, mais ça n'a jamais voulu se mettre sur ma carte. Donc, j'ai refait l'image en important simplement mon visuel dans l'
éditeur de cardart.cc
, qui exporte un PNG clean au bon format en 1536 × 969 et ça a fonctionné.
Et voilà, quand je paie en sans contact, maintenant ça donne ça... Je pense que les caissier.es vont flipper.
D'ailleurs, si vous cherchez d'autres visuels, il y en a plein sur
cardart
en téléchargement gratuit. La carte d'identité de Bob l'Eponge m'a tenté aussi, je l'avoue....
Le clavier du code, le Mac en moins, et le piège
Notez que AirCard sait aussi habiller le clavier du code de verrouillage avec des thèmes en .passthm. Suffit de vous rendre dans l'onglet Passcode, vous glissez le fichier passthm, vous l'appliquez puis vous redémarrez, et là, normalement, vous avez un super beau clavier. Pour ma part, je n'ai pas essayé parce que je m'en fous un peu, mais bon, c'est là.
Ah et sinon, si vous n'avez pas de Mac, il y a aussi une version
AirCard-iOS
qui fera le taf uniquement depuis l'iPhone, mais ça exige iOS 18 minimum, une installation par sideload (SideStore, AltStore, TrollStore ou LiveContainer) et un appairage par le mode développeur. Donc, c'est un peu plus relou qu'avec l'application pour macOS.
Et le petit piège dont je vous parle au début, c'est que la version 1.2.5 de Aircard n'a pas de bouton pour restaurer le visuel d'origine. Donc, si celui-ci ne vous plaît plus, vous pouvez soit le remplacer par un autre, soit vous devez retrouver votre visuel d'origine en téléchargement sur le web. Après, peut-être qu'en supprimant la carte du wallet et en la recréant, ça réparera le visuel, je ne sais pas... Faudra tester !
Apple has released watchOS 27.0.1, a small but important update aimed at fixing unexpected restarts affecting some of its newest Apple Watch models. The update arrives roughly a week after the launch of watchOS 27 and is specifically focused on improving stability rather than introducing new features. watchOS 27.0.1 Targets Unexpected Apple Watch Restarts The […]
Most of us have two or more gadgets that need constant charging, plus several chargers and cables to keep them all juiced up. That’s probably fine if you have an entire outlet strip at home or in the office, but when you’re working with a small space, or you’re traveling and on the go, it can be a real challenge to charge multiple devices at once. You end up with a tangle of cords and charging heads, or sometimes you even have to take turns charging your gadgets.
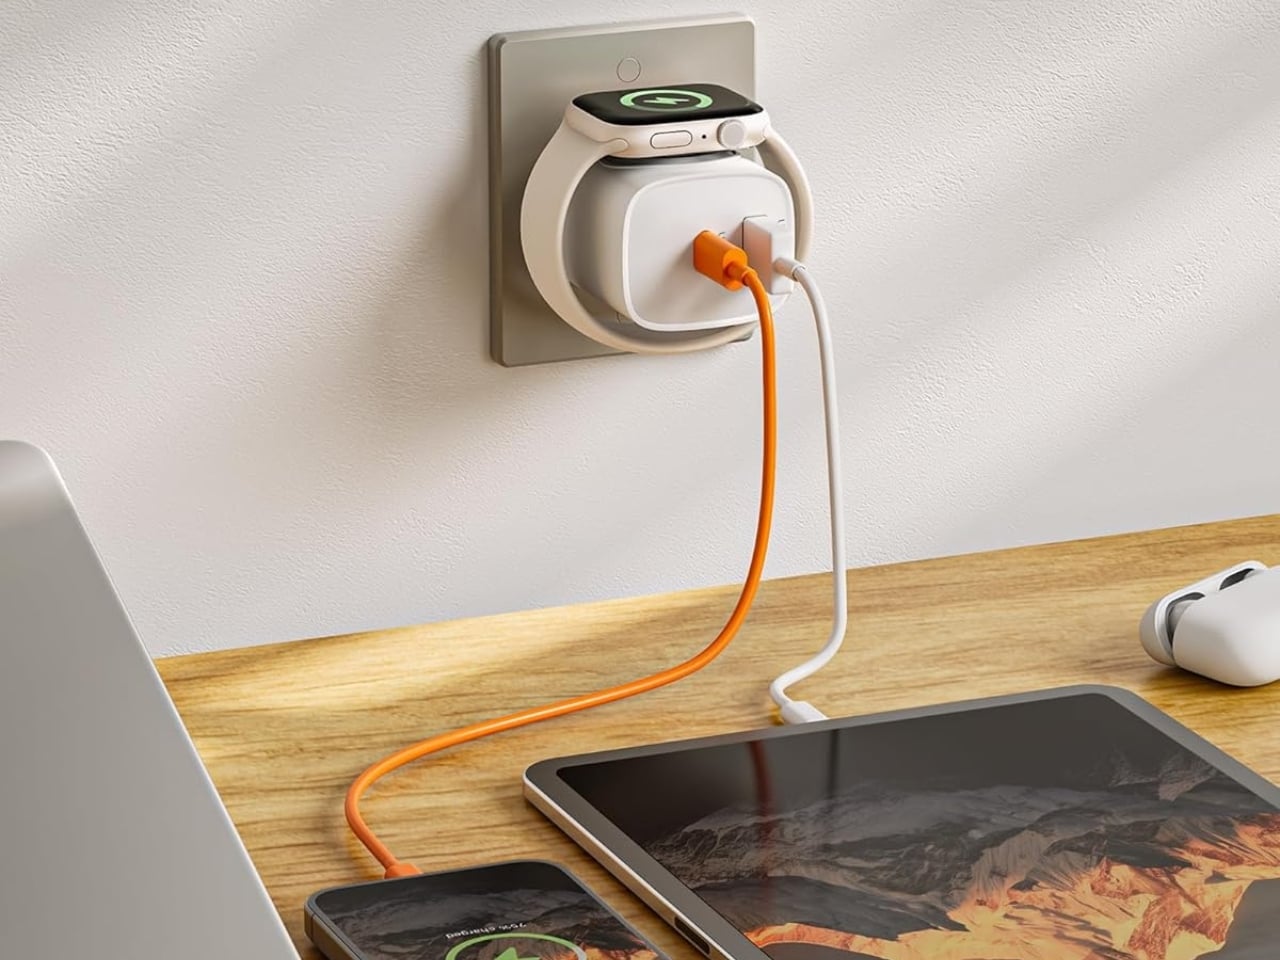
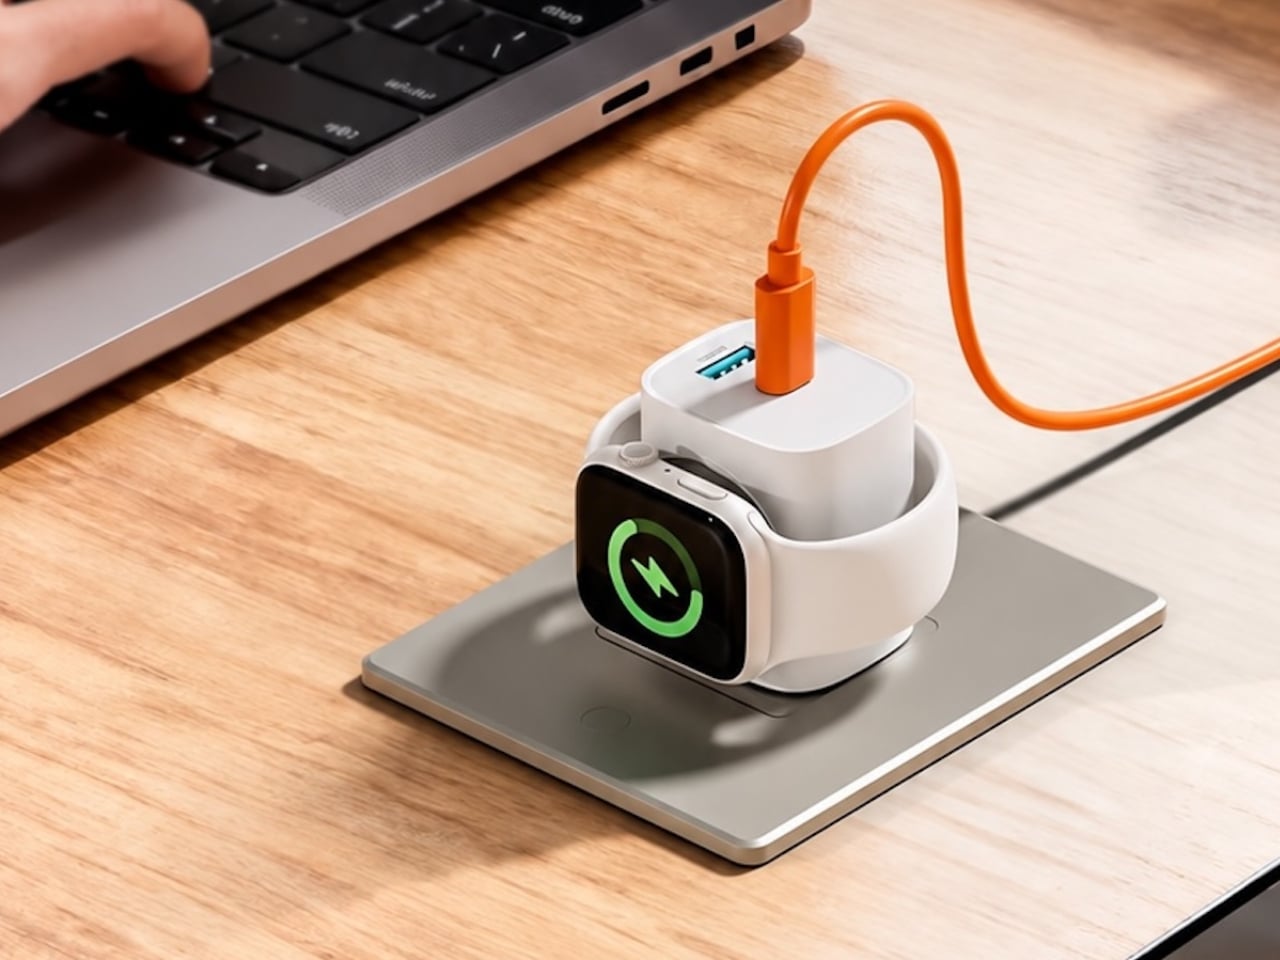
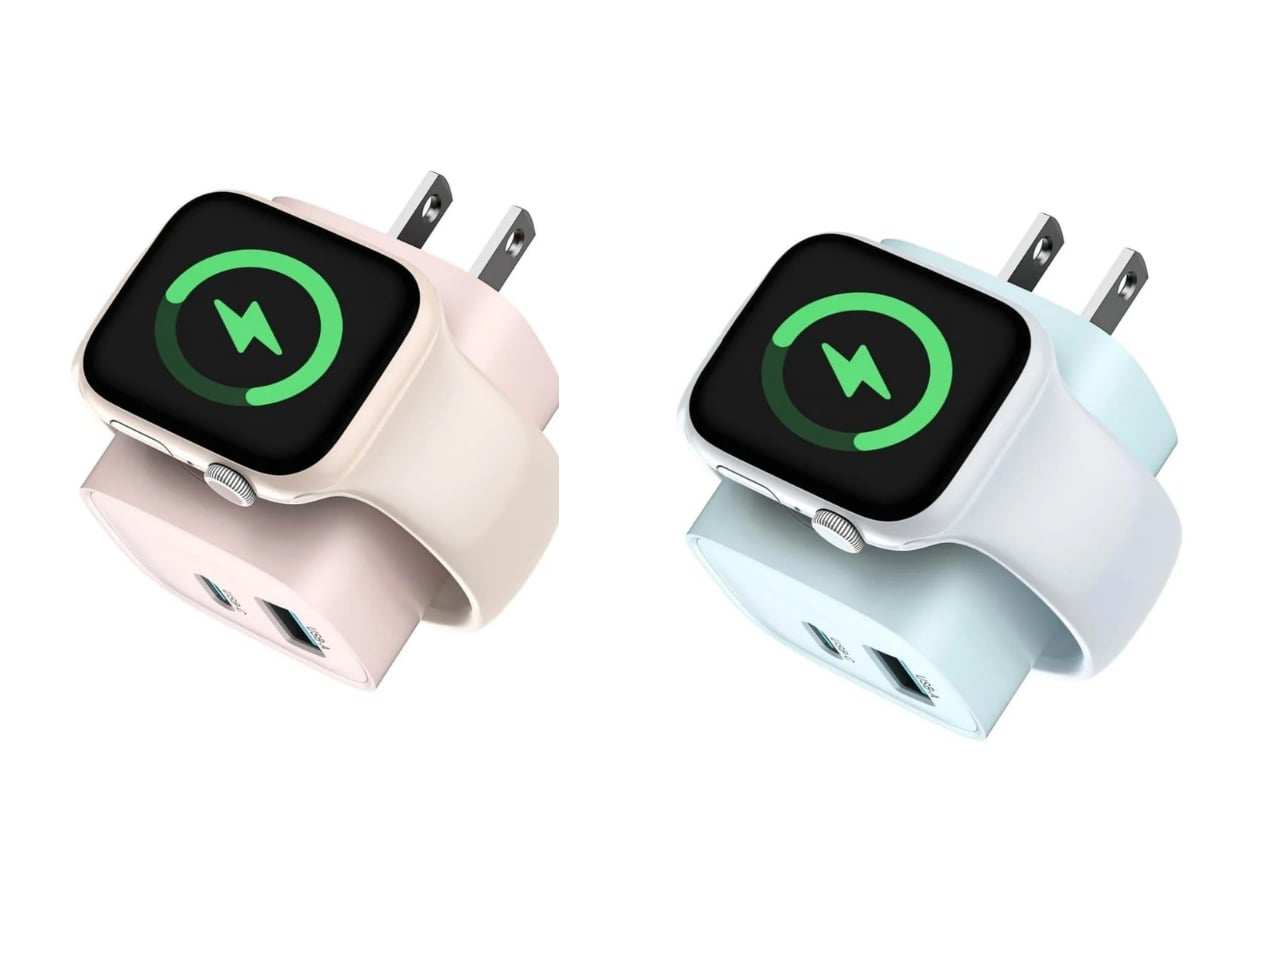
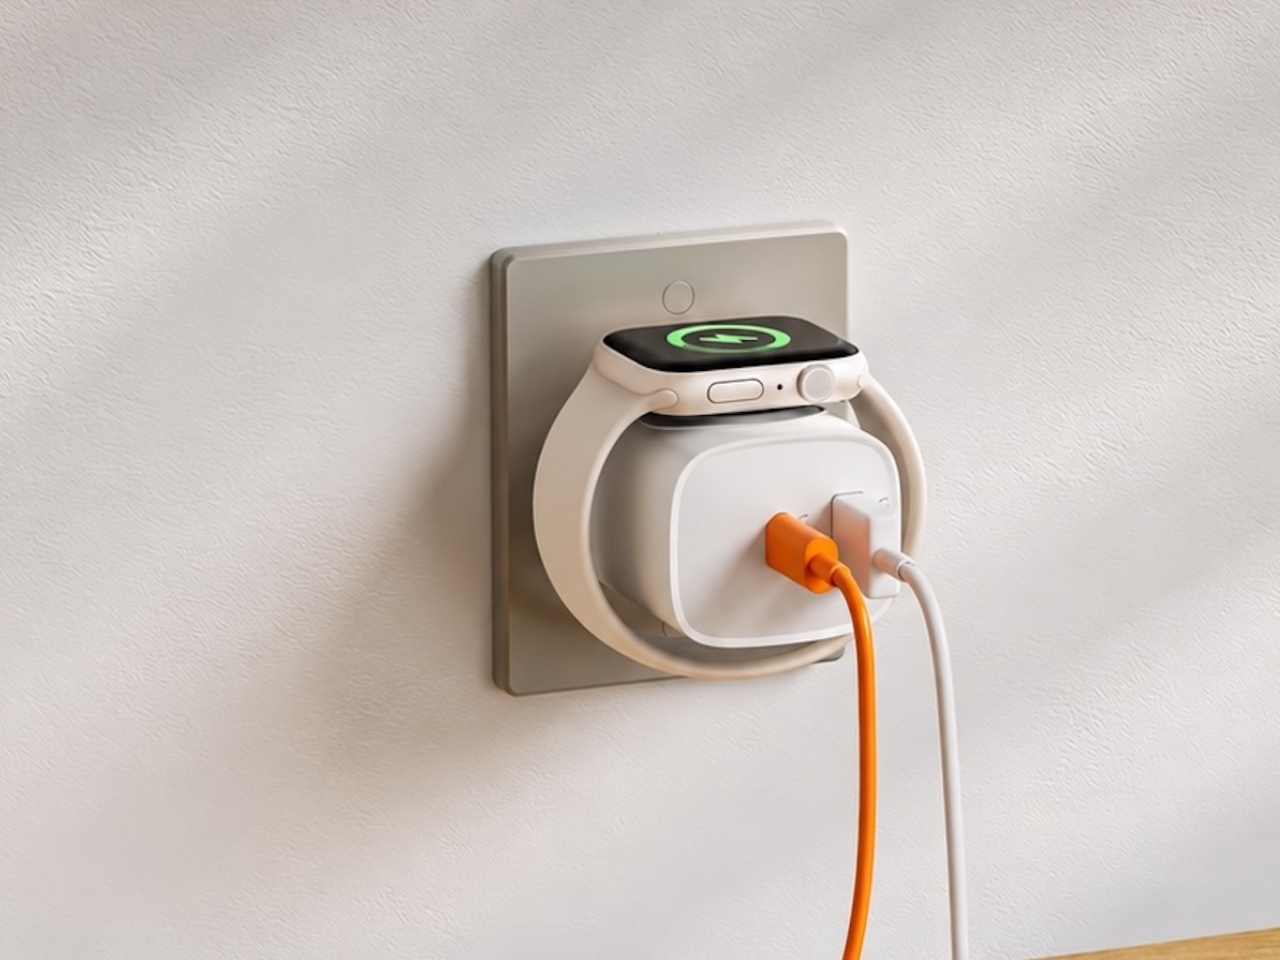
If you mostly own Apple devices or other USB-C-powered gear, the TESSAN 3-in-1 USB-C Charger may actually solve that problem for you. It’s a compact wall charger with a USB-C port, a USB-A port, and a built-in magnetic Apple Watch dock, so you only need one outlet to power up three devices at the same time.
This 3-in-1 charger is especially handy when you only have one outlet available but need to power up three different devices. A few years ago, this wouldn’t have been much of an issue, since most of us only had one phone to worry about. But now that owning multiple devices is the norm, charging has become an everyday hassle. What do you do when you’ve got a phone, a pair of AirPods, and a smartwatch that all need power at the same time?
TESSAN’s charger features fast charging through its 20W USB-C port, so you can get a device like the iPhone 15 up to 55 percent battery in just 30 minutes. At the same time, its 18W USB-A port can juice up an accessory simultaneously while your main device charges. It also offers broad compatibility, working with everything from the latest iPhone models to AirPods and other USB-powered devices. The real star of the show, though, is the built-in magnetic charger for your Apple Watch. There’s no separate puck or cable needed here. Instead, you get a self-aligning dock, so you won’t have to fuss with positioning your watch every time you need to charge it.
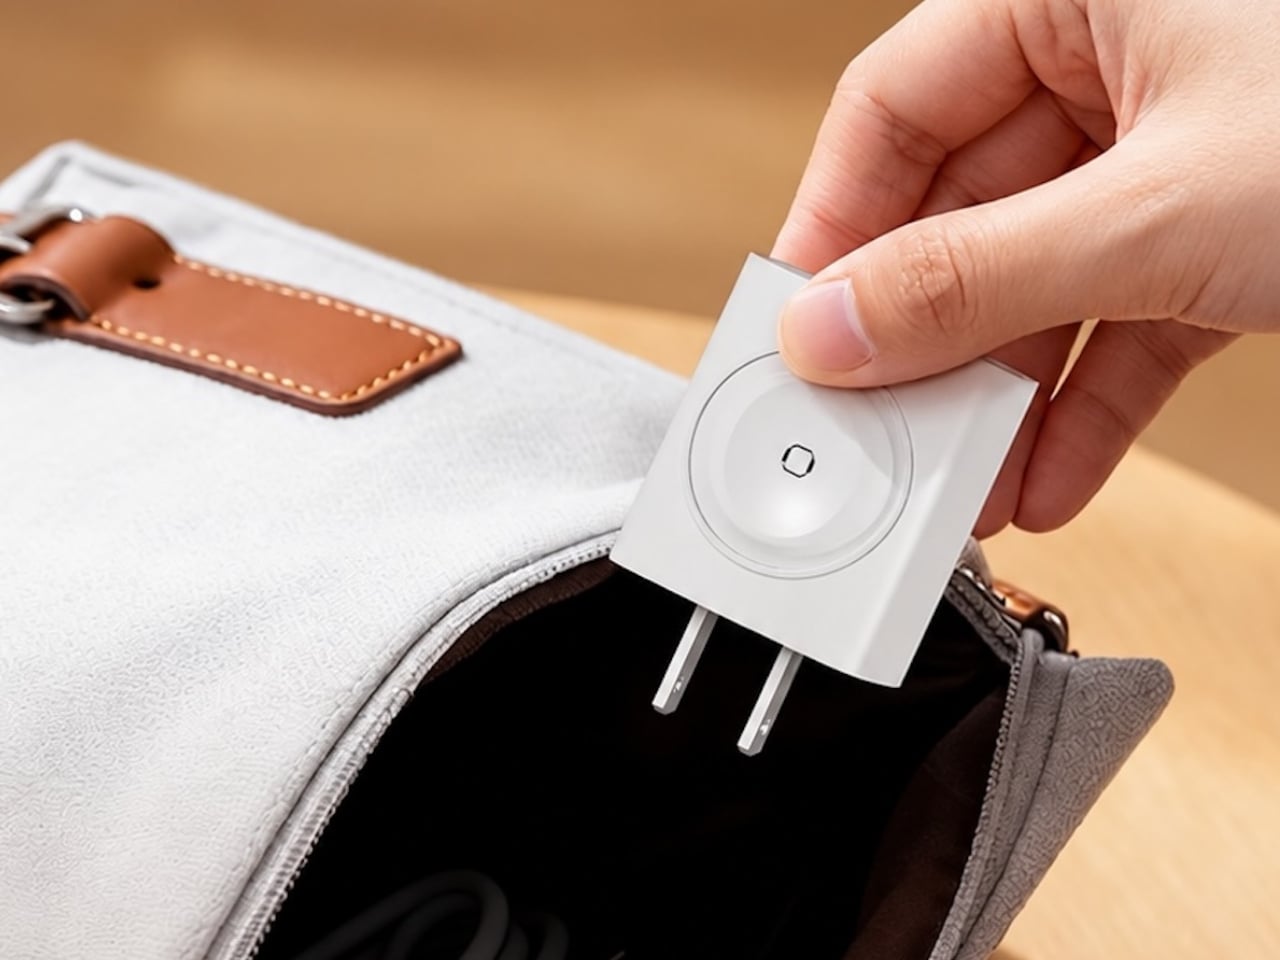
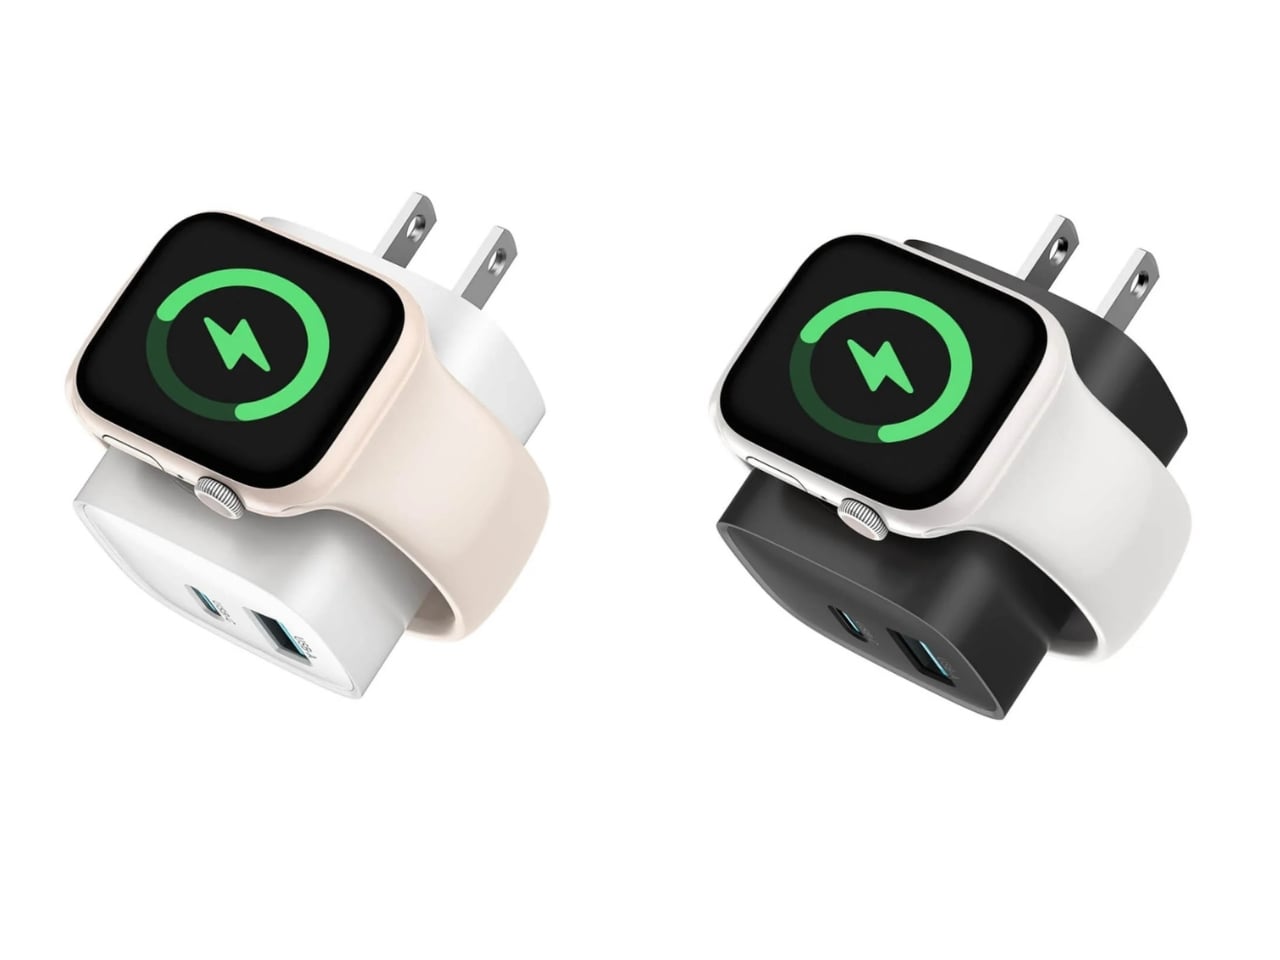
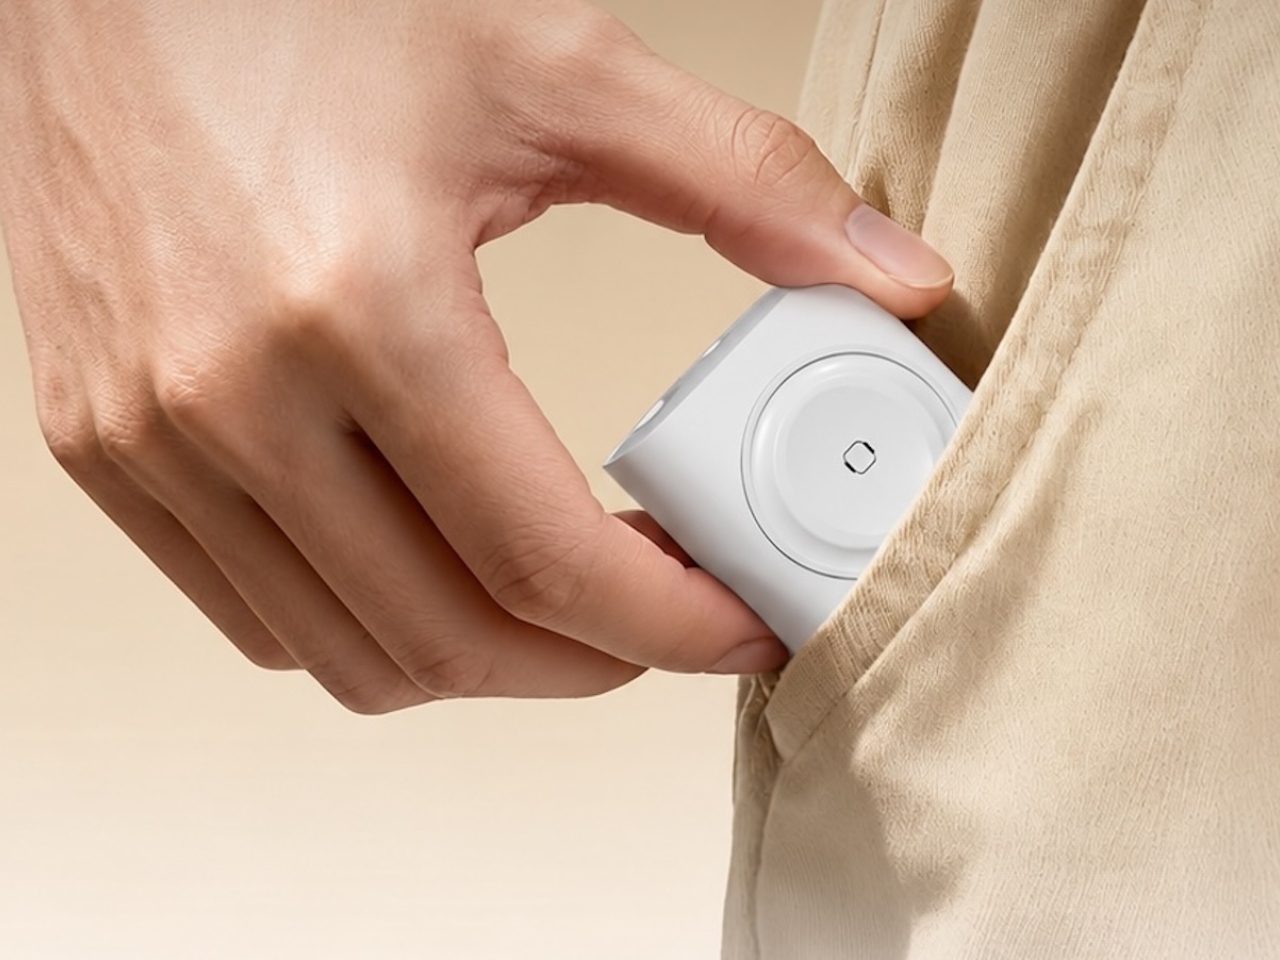
The charger comes in four finishes (white, black, pink, and blue) and is clearly designed to double as a small desk-aesthetic item, though it will likely still read as “just a charger” to most people, especially in the white colorway. Where it really shines is portability: it’s a travel-friendly device you can toss in a bag without a second thought, instead of hauling around three separate chargers that eat up space and weight in your carry-on.
How does it stack up against the competition? The most obvious comparison is Belkin, whose 3-in-1 MagSafe charging stands are the gold standard in this category. Belkin’s BoostCharge Pro and UltraCharge Pro docks charge an iPhone, Apple Watch, and AirPods wirelessly and look considerably more premium sitting on a nightstand, but they also run anywhere from $95 to $150 and require more desk real estate. TESSAN’s charger, at $20.99, skips the wireless charging bells and whistles in favor of a compact, plug-in design that’s built more for function and travel than for a styled bedside setup. If you want a showpiece charging stand for your living room, Belkin is still hard to beat. But if you want something inexpensive, pocketable, and fast enough to get you out the door in the morning, TESSAN makes a compelling case for itself as the budget-friendly, travel-first alternative.
At the end of the day, this isn’t a charger trying to be a lifestyle centerpiece. It’s a charger trying to solve a genuinely annoying, everyday problem: too many devices, not enough outlets, and not enough patience to wait in line for your turn at the power strip. For $20.99, the TESSAN 3-in-1 USB-C Charger delivers fast charging, broad compatibility, and a clever built-in Apple Watch dock in a package small enough to disappear into a laptop bag or a nightstand drawer. It won’t turn heads the way a sleek charging stand might, but it will quietly keep your phone, watch, and earbuds powered up without the usual cord chaos. For anyone juggling multiple Apple devices on a daily basis, or packing for a trip and dreading the tangle of cables, this little charger earns its spot on the “actually useful” list.
Apple Configurator est un outil gratuit qu'Apple fournit aux écoles et aux entreprises pour préparer des iPhone par paquets de cent. Si ça vous dit quelque chose, c'est parce que c'est aussi l'outil que j'ai utilisé pour mon
tuto sur le pair locking
. Mais cela ne veut pas dire que vous ne pouvez pas l'utiliser pour votre propre plaisir ! En effet, rien n'empêche de le lancer sur le vôtre, et ce qu'il vous permet alors de faire est plutôt radical : faire disparaître l'App Store de l'écran d'accueil.
Vous branchez l'iPhone sur un Mac en USB, vous le passez en mode supervisé, puis vous vous fabriquez un profil de configuration que vous lui poussez. Cela permet par exemple de limiter la présence de certaines app pour ainsi transformer votre téléphone en dumbphone. Ça permet donc de lutter contre vos démons de la perte de temps que sont par exemple les réseaux sociaux.
La case à décocher dans Configurator s'appelle "Autoriser l'installation d'apps à l'aide de l'App Store". Une fois que c'est fait et que le profil est déployé sur le téléphone, l'icône de l'App Store n'apparaît plus sur l'écran d'accueil, et l'utilisateur ne peut plus installer ni mettre à jour ses apps (snif).
Les trois sous-cases de l'installation d'apps, toutes marquées "appareils supervisés"
Ensuite, reste à empêcher le propriétaire du téléphone (c'est-à-dire vous) de retirer ce profil 5 minutes plus tard. Ça se règle dans l'onglet Général du profil, avec un menu qui contrôle quand celui-ci peut être supprimé, et que vous basculez sur "Jamais".
Sauf que Jamais ne veut pas vraiment dire jamais. En effet, Apple documente lui-même la sortie de secours... Pour virer ce profil, il faut effacer l'intégralité du contenu et des réglages, ce qui arrête la supervision, et le profil s'en va avec. Ce n'est donc pas une vraie prison, mais plutôt une grosse friction, et son prix c'est le contenu entier de votre téléphone.
Les apps déjà installées, elles, ne bougeront pas d'un pixel. Elles gardent leurs notifications et leur compte connecté, parce que la restriction n'efface rien du tout... Elle vous retire seulement la possibilité d'en réinstaller une. Le ménage se fait donc avant, pas après. Et avant même ça, il y a un péage puisque la supervision ne s'active que sur un iPhone neuf ou entièrement effacé, avant que l'assistant de réglages n'apparaisse pour la première fois.
La première étape consiste donc à vider votre téléphone, sauvegarde comprise. Ensuite, tant que le profil tient, plus une seule app ne se met à jour, correctifs de sécurité compris. Et une app supprimée par mégarde (votre appli bancaire, votre générateur de codes à deux facteurs) ne reviendra pas avant que vous soyez rentré rebrancher le Mac. Ça peut être problématique en voyage, donc je vous conseille aussi de décocher la case "Autoriser la suppression d'apps (appareils supervisés)" pour justement empêcher aussi la désinstallation des apps.
L'idée de mettre en place un profil comme ceci nous vient de Stepan Parunashvili, qui raconte
sur son site
être passé de 4 à 2 heures d'écran par jour en deux mois. Sa bidouille ne s'arrête d'ailleurs pas à l'App Store, puisqu'il y ajoute aussi un filtre de contenu réglé sur les sites autorisés uniquement, sans quoi les services dont on vient de retirer les applications resteraient accessibles par le web.
Si ça vous chauffe de mettre ça en place pour gagner du temps de vie, comptez deux heures d'installation environ, une remise à zéro complète de votre smartphone, et deux bonnes semaines avant que votre liste d'apps soit la bonne.
Maintenant, si ça vous semble disproportionné, ça l'est un peu.
Dumb Phone
, que je vous présentais en janvier, vise le même résultat avec les API de temps d'écran et sans rien effacer... mais il se désactive aussi super facilement.
Bref, c'est la méthode brutale, pour ceux que les méthodes douces n'aident pas.

 Connexion